Several months ago, my boss came back from Microsoft Ignite where he ‘drank the Kool-Aid’ big time. We had been telling him about all of the amazing things that were being released to help with the move to Modern Windows Management with Windows 10 for months but he got to hear it directly from some of the experts and got really excited. One of the things he suggested looking into came from a session with Mike Nystrom and Johan Arwidmark called Expert-level Windows 10 deployment (Skip to 50:12 for driver management). I had come across several posts discussing this technique but hadn’t attempted it previously but got to work testing it.
Here’s some background that will come into play a little later on.
- I am no longer using reference images, just the original media from Microsoft - in this case, I’m using 1709.
- The 2 areas that I had issues with were the new ‘Download Driver Packages’ step and the DISM /Add-Driver command referred to in the blogs below.
- I use the ‘Access content directly from the distribution point when needed by the running task sequence’ setting on my OSD deployments

The Setup
To start, you should follow one of these blogs to get set up - others have written great blogs about this technique so why not just refer to them? Fair warning, some are more automated than others and some go into more detail than others. I would suggest reading all of them to get familiar with the concepts then build and test the basic setup before trying to use the automated versions.
- Kim Oppalfens (the basics and easy to test)
- Mathew Teegarden on Deployment Research (Semi-Automated)
- Nickolaj Andersen (Original Semi-Automated)
- Nikolaj Andersen(Super automated)
- Etc…
There are lots of variations of these posts and the techniques have evolved since they were first posted. The general idea is that you download your hardware driver bundles from your hardware manufacturers, then import them into SCCM as Packages, not Driver Packages. Then you use DISM to apply the drivers to your OS image before it is installed during your OSD task sequence.
My Challenges
Download Package Content
This step lets you download content from one or more packages (separate steps for each) and save the path into a shared variable. You can then reference the variable in later steps like Apply Driver Package or the custom DISM command from the above blogs. What isn’t mentioned in the Microsoft documentation is that this step cannot be used when the Deployment option of ‘Access content directly from the distribution point when needed by the running task sequence’. In a case with Premier Support, the resolution was to have the documentation updated to include better verbiage. I haven’t seen any updates yet, but have found that the Microsoft Documents folks have an open source option that allows for community edits. I may have to look into that soon. Here’s a link to the Docs Contributor Guide.
The Workaround
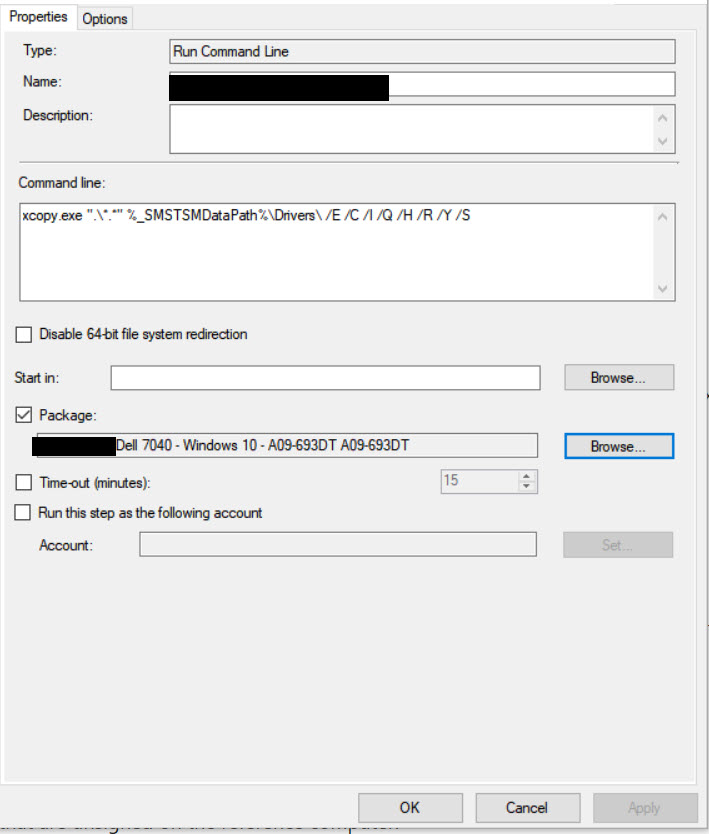
- This assumes that you are using Packages, not Driver Packages.
- Create a Run Command Line TS step
- Enter this command line:
xcopy.exe ".\*.*" %_SMSTSMDataPath%\Drivers\ /E /C /I /Q /H /R /Y /S - Change
%_SMSTSMDataPath%to any pre-defined path you choose. This is the default location that SCCM uses. Whatever you specify here will be used in the DISM step later.
Apply Driver Package
As I mentioned, I had issues with the custom DISM commands that everyone was using, so I was using Apply Driver Package along with my xcopy command line to ‘install’ a dummy package to create the entry in the unattend.xml file that setup uses to find drivers.
| |
This step takes the driver package and makes it available to Windows setup. If you check Apply driver package via running DISM with recurse option Windows setup will attempt to use DISM to import the drivers into the OS image that was staged in the Apply Operating System Image step. It will also add this entry to the unattend.xml file with the path to the drivers to allow setup to grab them during install, so if you didn’t check the DISM option, it would still be able to grab the cached drivers. Keep this in mind because it helped lead me to my issue.
Apply Operating System Image
Here’s where it all fell apart for me. We have always used reference images. Most blogs about OSD assume reference images are used. Since we are hoping to keep up with the Windows release cadence, I decided to see how well things went just using the default OS from Microsoft to save us some back-end support efforts moving forward. I swapped the reference image for the default image in the TS but there are 2 options available for this step. Generally you set them in the MDT TS wizard and don’t mess with them unless you’ve updated your image so I used Microsoft’s guidance on this:
Apply operating system from a captured image
Installs an operating system image that has previously been captured. Click Browse to open the Select a package dialog box, and then select the existing image package you want to install. If multiple images are associated with the specified Image package, use the drop-down list to specify the associated image that will be used for this deployment. You can view basic information about each existing image by clicking on the image.Apply operating system image from an original installation source
Installs an operating system using an original installation source. Click Browse to open the Select and Operating System Install Package dialog box, and then select the existing operating system installation package you want to use. You can view basic information about each existing image source by clicking on the image source. The associated image source properties are displayed in the results pane at the bottom of the dialog box. If there are multiple editions associated with the specified package, use the drop-down list to specify the associated Edition that is used.
Here’s the dialog box:

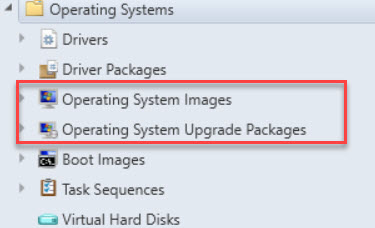
Logically, I selected door #2 Apply operating system image from an original installation source since it perfectly describes what I was doing. What I failed to notice was that when you click Browse to select your image, you are presented with all of your Upgrade Operating System Packages, not your Operating System Images. (Note: I initially didn’t include ‘Upgrade’ in the name of the Image, which only compounded this issue).

As you may know, the media is different for these two OS types. Operating System Images uses the Install.wim from the source media while Upgrade Packages uses the full source folder for the OS.
When Apply Operating System Image would run, with my Original Installation Source (Upgrade Package), it would apply in a different way than the Captured Image option causing the Apply Driver Package step (which uses DISM) as well as the Run Command Line step from the Modern Driver Management blogs to fail. I switched to using the captured media option, and selected my original Windows 10 1709 media and the Apply Driver Package and the DISM command line began working as expected. I am now well on the road to completing the automation of Modern Driver Management for our environment.
Note: At the time of this posting, I have a case open with Microsoft Premier Support to determine if this is a bug or by design (with really poor documentation/verbiage). I will update once I hear back.