In a previous post I described how to deploy applications to users using Active Directory (AD) security groups as direct members of ConfigMgr collections. In this post, I’ll go over how to integrate the Microsoft Store for Business into your ConfigMgr console and review the various ways to deploy these apps from ConfigMgr. While Microsoft has done great job documenting individual parts of this process, I had to jump all over to find everything. I will be linking to their instructions for some steps, while highlighting some of the key points and lessons learned with it and to hopefully put you on the path to using the Microsoft Store for Business. I will also attempt to highlight any steps that will incur costs within Azure, though most of what I’ll cover is free.
Signing up for the Microsoft Store for Business
If you don’t already have an Azure AD Tenant, you can create the tenant and sign up for the Microsoft Store for Business all at the same time. All you need is an email address. There used to be an link on the Business Store home page to create a new store, but I can’t seem to find a working link any more so the steps I list today (May 2019) may not be accurate for long. Regardless, you are looking for a link in the store to allow you to create a new Azure tenant.
Generally, I try to avoid screenshot-heavy how-to’s like this, but since the docs for the Store haven’t been updated since 2017, I decided that I’d make an exception. Start by visiting the Microsoft Store for Business and signing in to your tenant OR signing up for a new tenant and store account. If you’ve already got a tenant, skip ahead.
Creating a New Azure Tenant
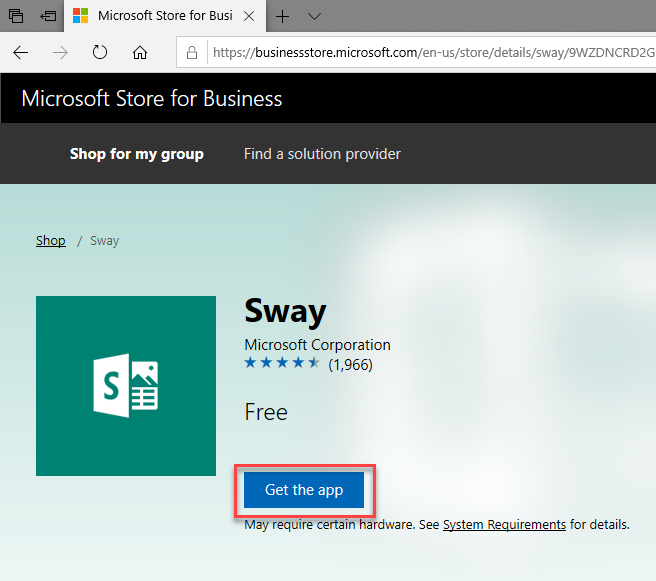
Since there’s no link, simply select an app that you’d like to add to your new store. In my example, I chose Sway. Note, I’ve noticed that if you select an education based app at this stage like Duolingo, you will be prompted to sign up as an Education account, instead of business.
Click Get the App
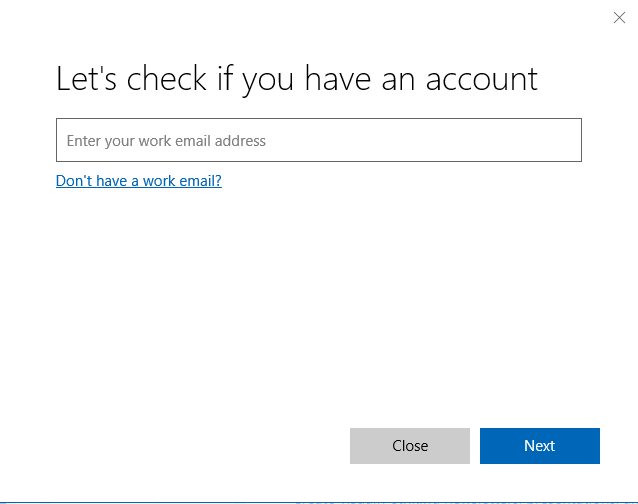
If you aren’t signed in, you will see the message Let’s check if you have an account. If you don’t see the work email address message as shown below, select another application, otherwise you will sign up for an education store.
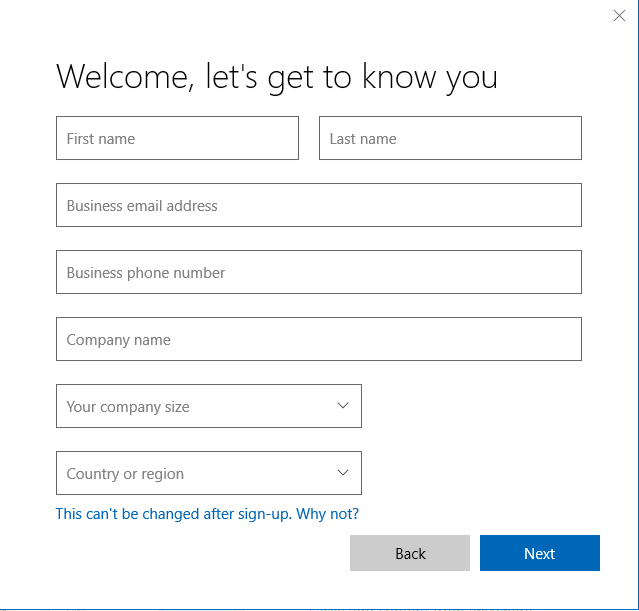
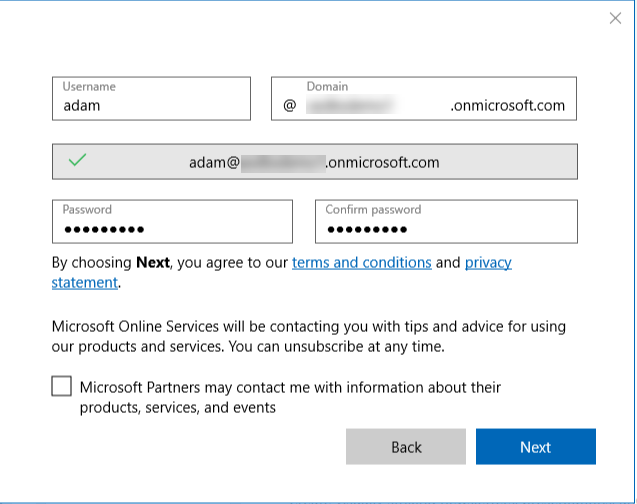
Fill in the application form. Use your business email address. This account will become an administrator of your store.
Enter the name of your new Azure Tenant.
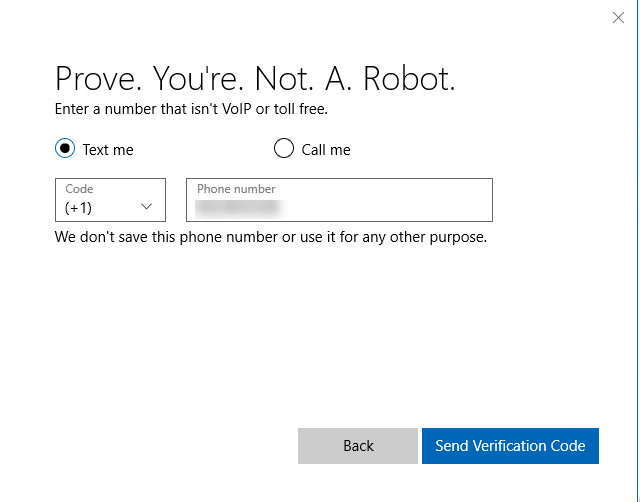
Prove you’re not a robot. Nice try robot!
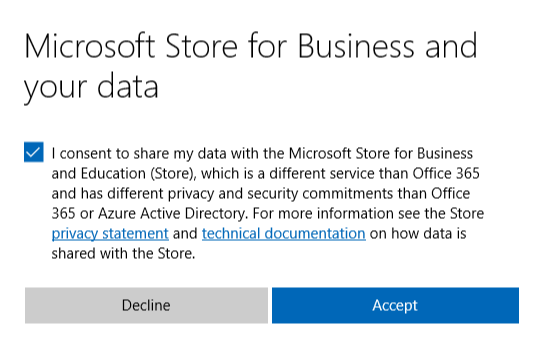
Consent to allow Microsoft to collect data about your company.
Once you’ve completed the registration, the application you selected will be added to your inventory.

Adding the Microsoft Store for Business to ConfigMgr
Note: The screenshots used for this post are from ConfigMgr 1904 TP but should be nearly the same as Current Branch. I just didn’t have a fresh CB lab available to demo with.
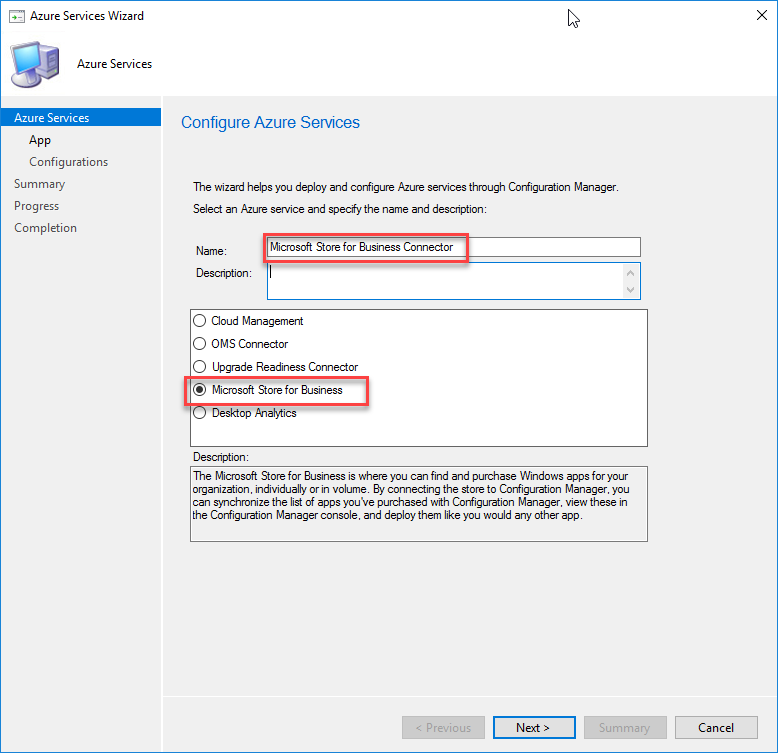
Open your ConfigMgr console and navigate to \Administration\Overview\Cloud Services\Azure Services. Click Configure Azure Services.

Select Microsoft Store for Business and enter a name for the connector and click Next.
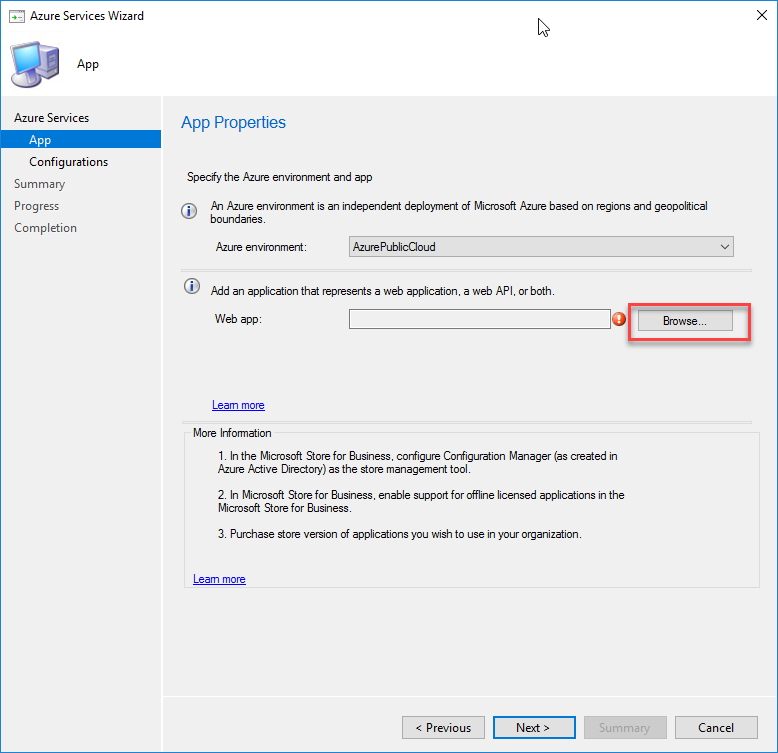
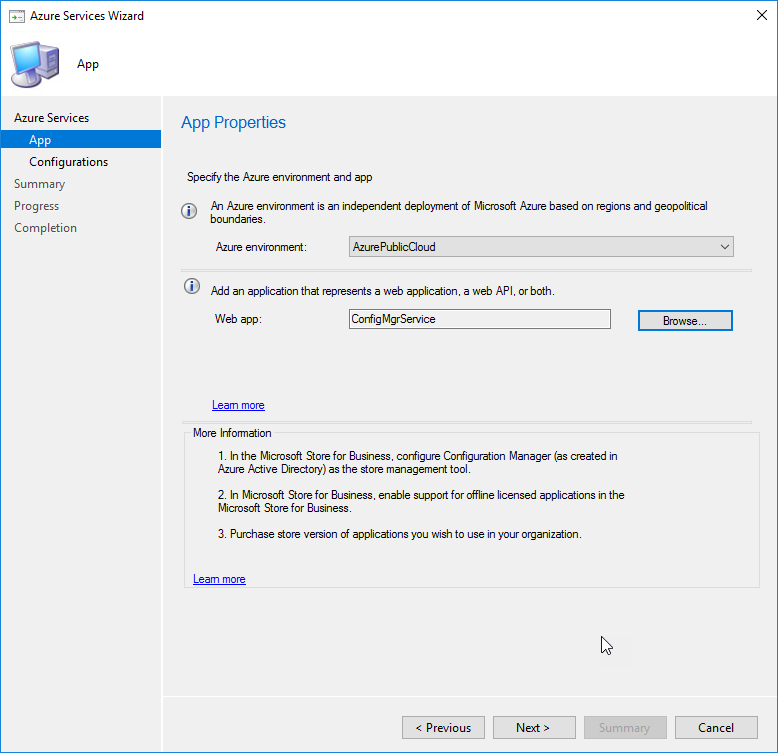
Click Browse to add an Azure web application.
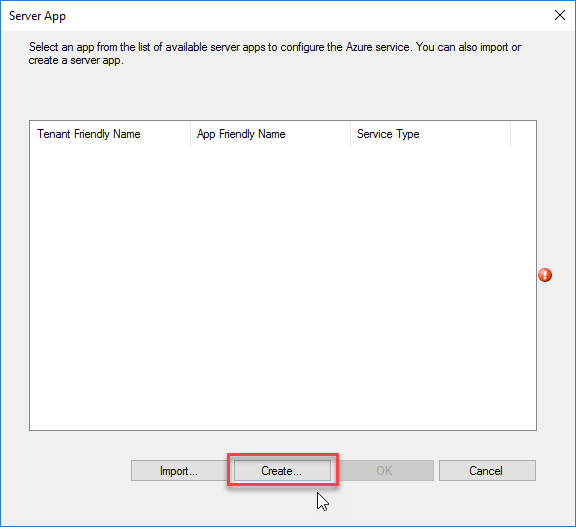
Select Create to create a new server application. If you have already added other cloud services, you may choose to select one from the list instead of creating a new one.
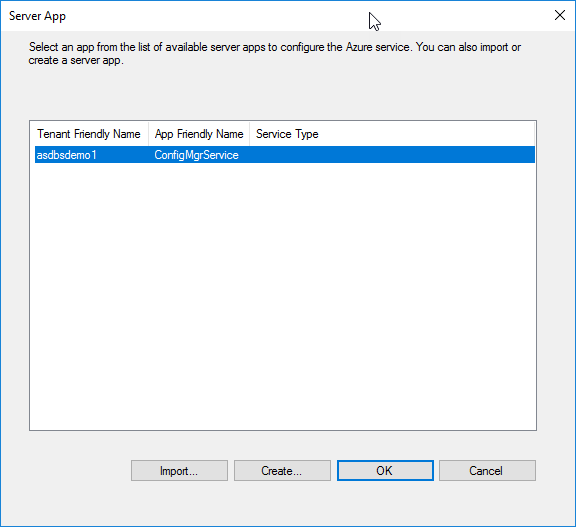
Fill in the form and click Sign in to sign into your Azure tenant with an Azure tenant administrator account. Remember the Application Namesince you will need to use it later. The URL and URI can be customized as needed, I just accepted the defaults. Click OK when complete.

Select the newly added application from the list and click OK.
Click Next
Create a new share to store your Business Store application data in. You will need to enable write access to this share for your ConfigMgr server machine account. Once complete, click Next.
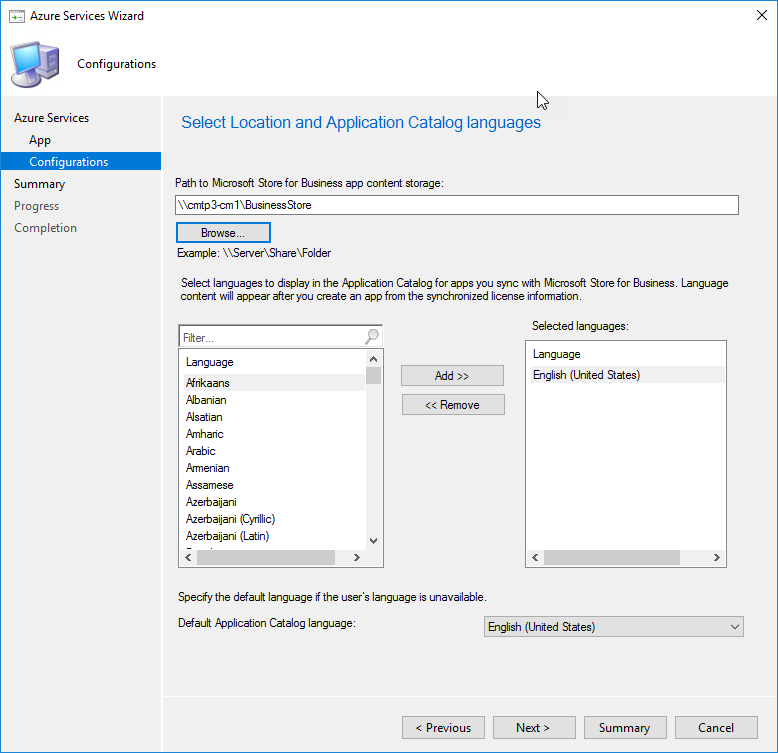
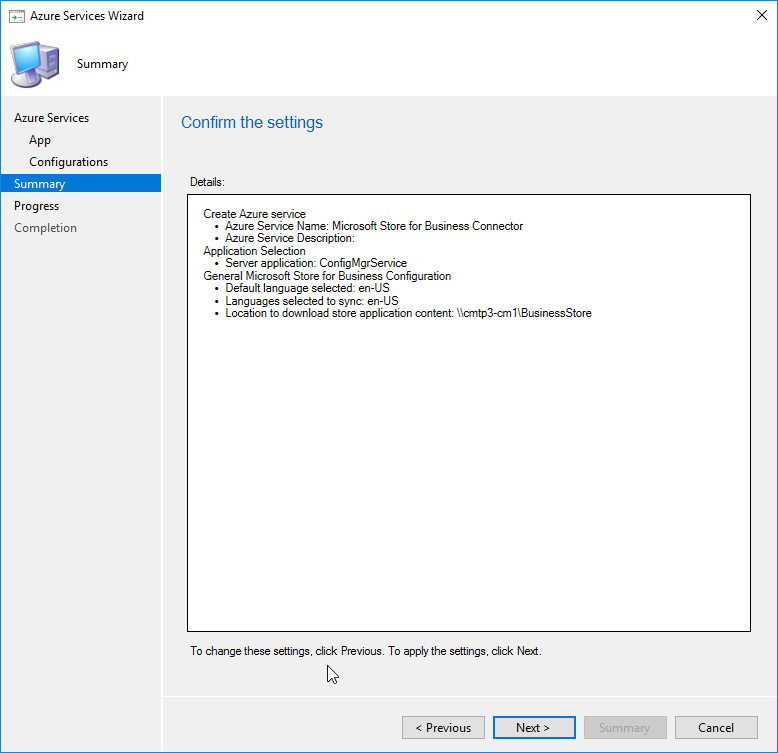
Verify that everything is correct and click Next.
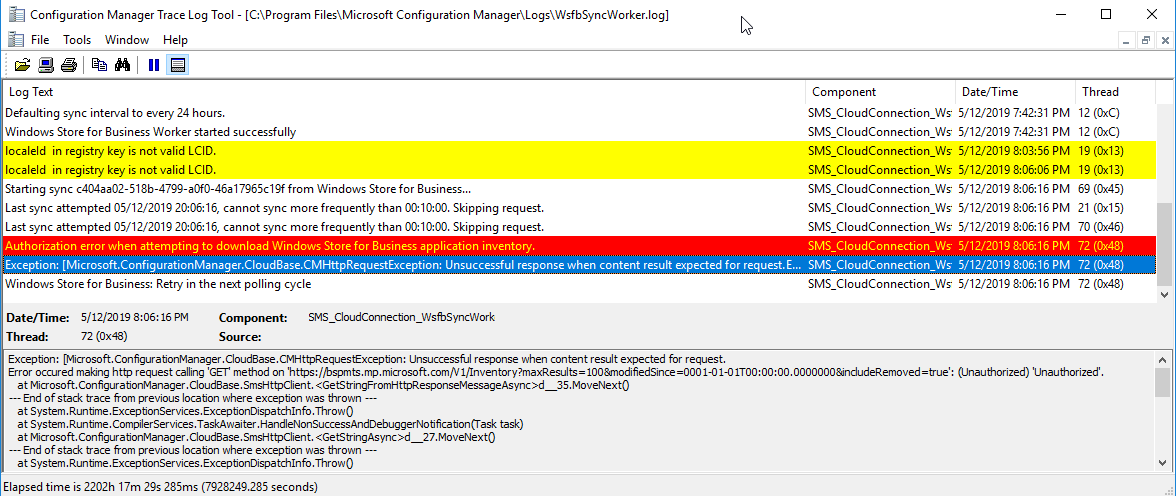
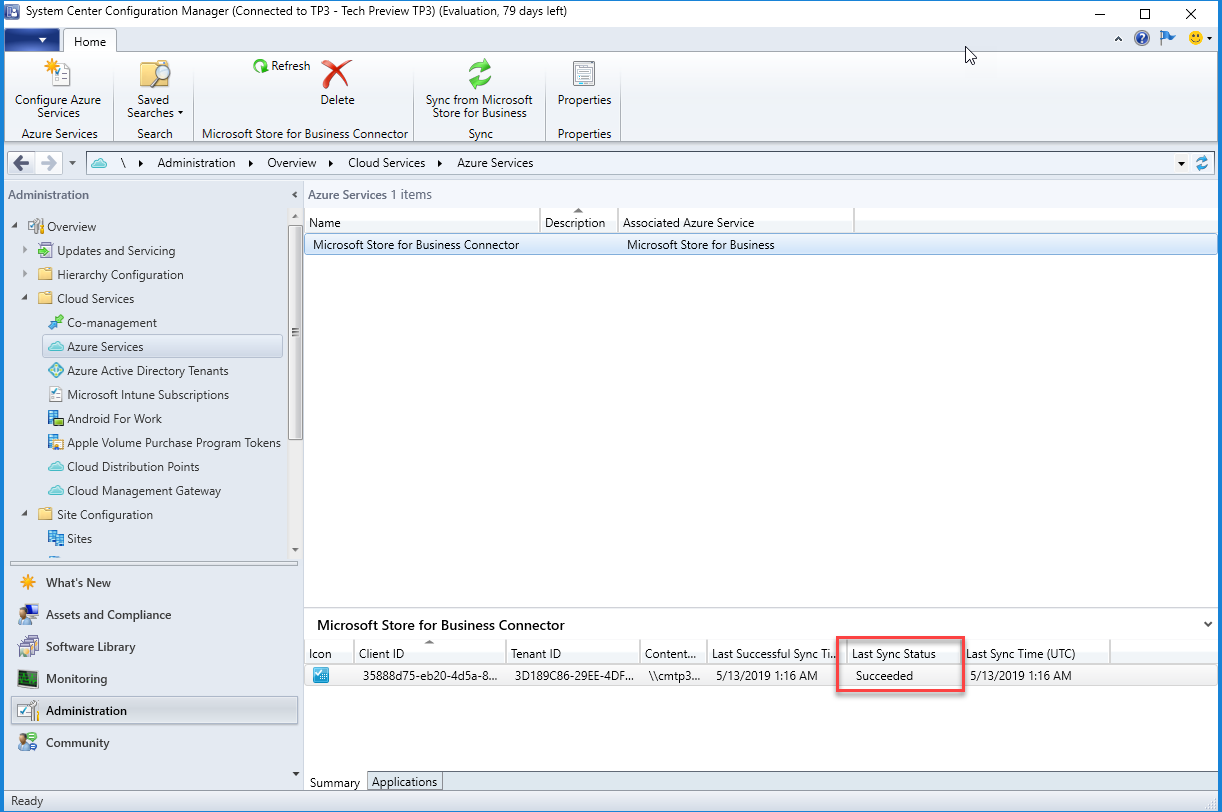
In the console, you should see the newly created connector and the Last Sync Status will show Failed. This is because the Azure web app needs to be granted permissions to manage the Business Store.
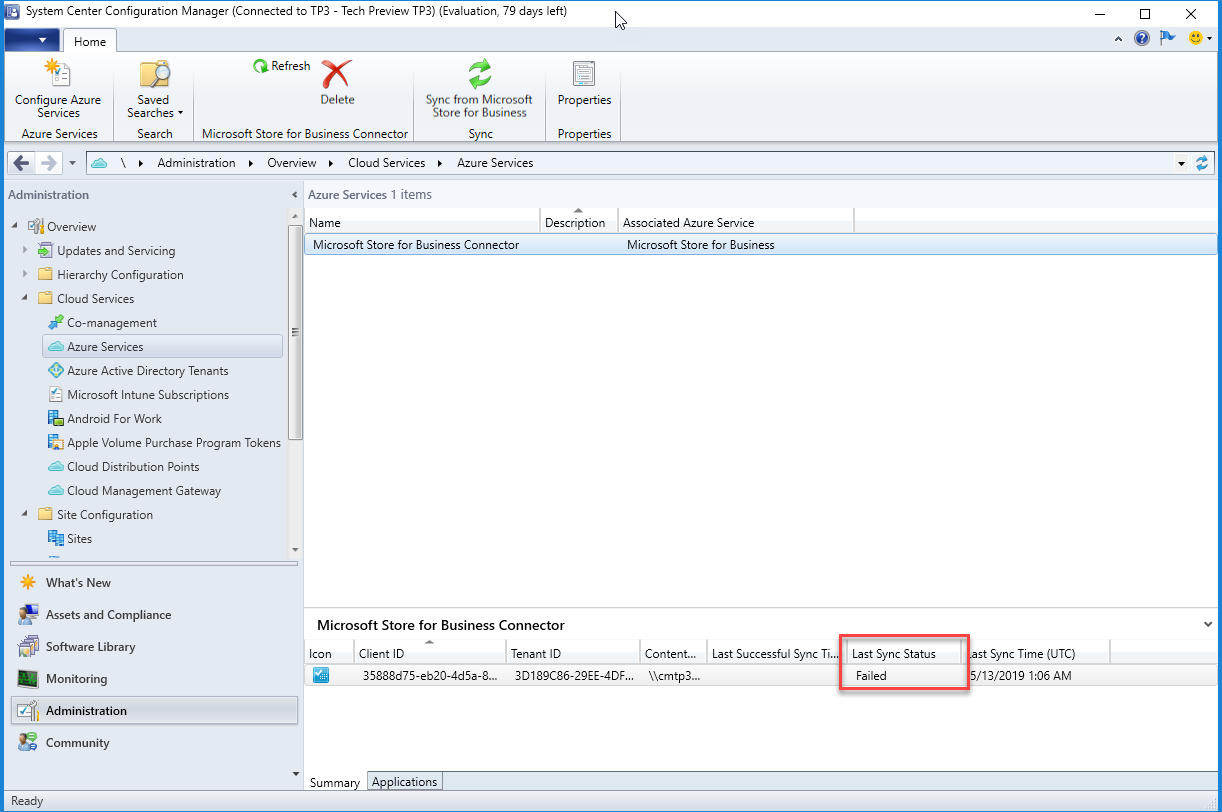
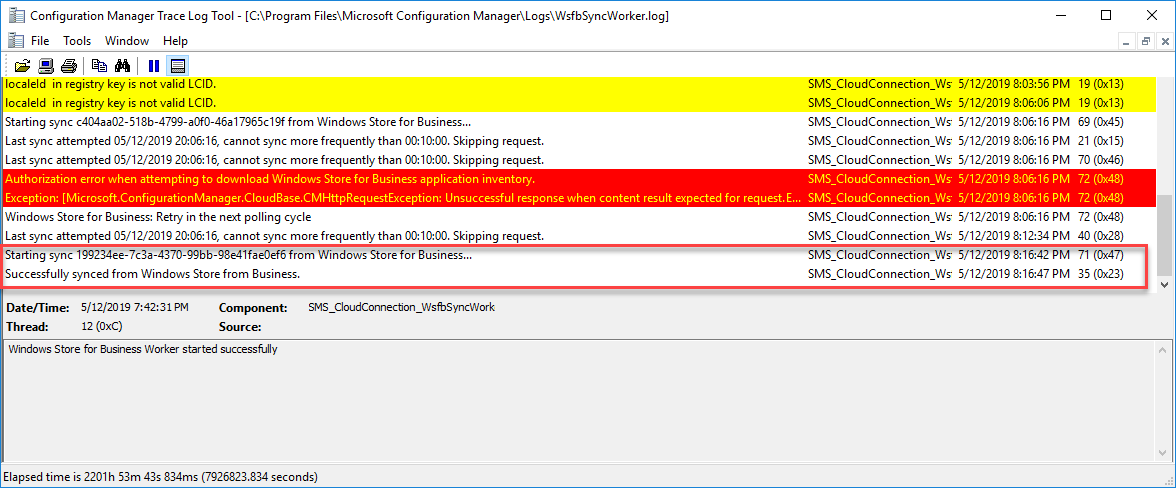
If you open WsfbSyncWorker.log from your site server, you can monitor sync progress. The store will automatically sync every 10 minutes, so you will need to wait until the next sync window to see any changes made in the store.
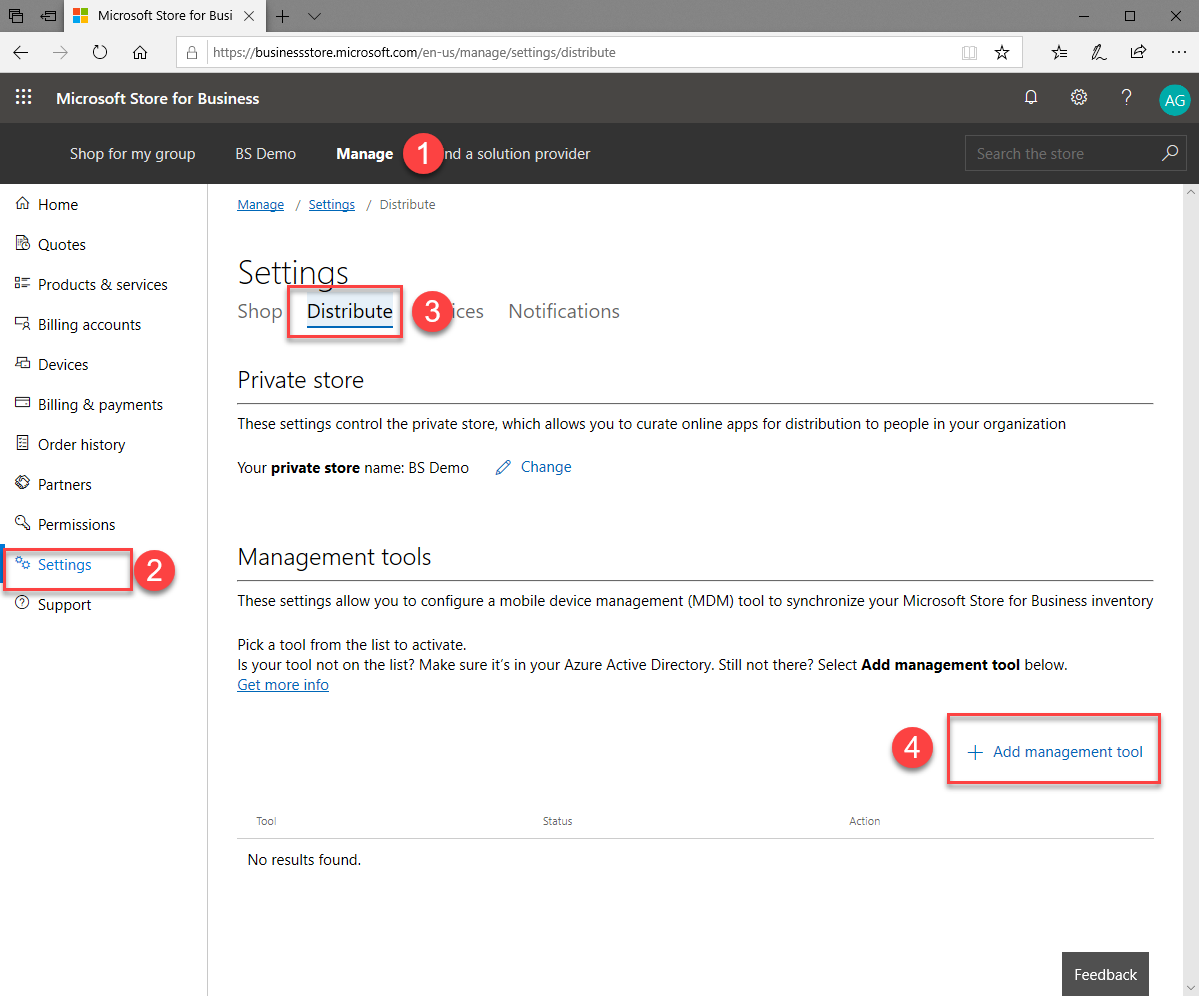
Giving ConfigMgr Permissions to Manage the Store
Open the store web page again and click on Manage>Settings>Distribute>Add management tool
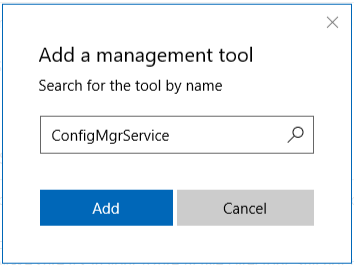
In the search box, search for the name that you gave the new web application. In my case, I called it ConfigMgrService.
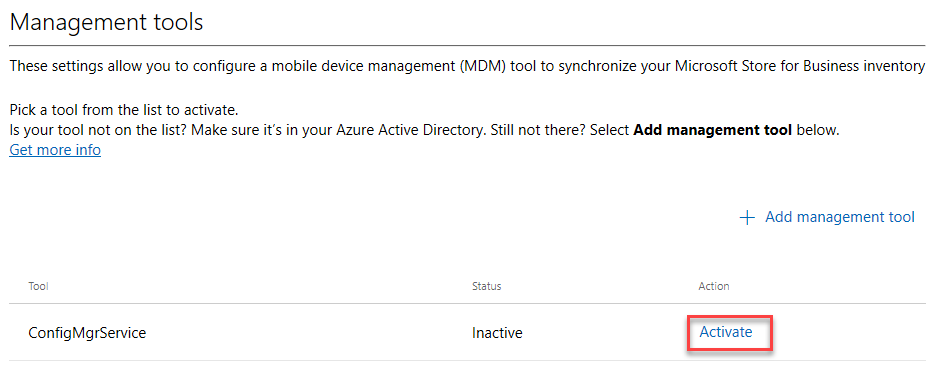
Once added, click Activate to enable the service. Note: This is also where you would enable Intune management as well.
Sync Your Store
Back in the console, you can be impatient like me and keep clicking the Sync from Microsoft Store for Business button or just wait for 10 minutes for the sync to happen. Once complete here’s what you should see in the console and logs.
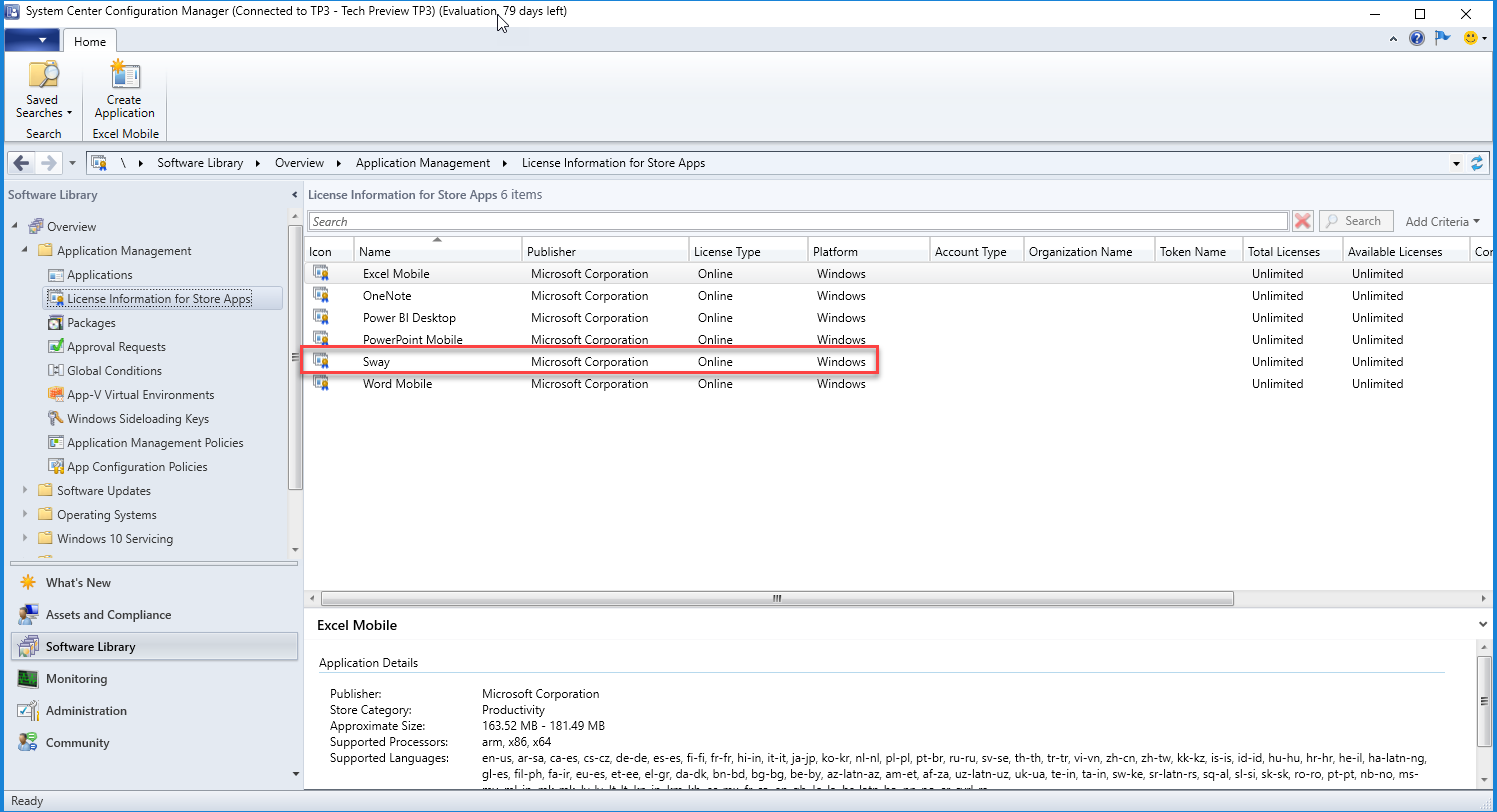
Navigate to Software Library>Overview>Application Management>License Information for Store Apps to see a list of your store apps.
You can find more info here.
Adding Apps to Your Store
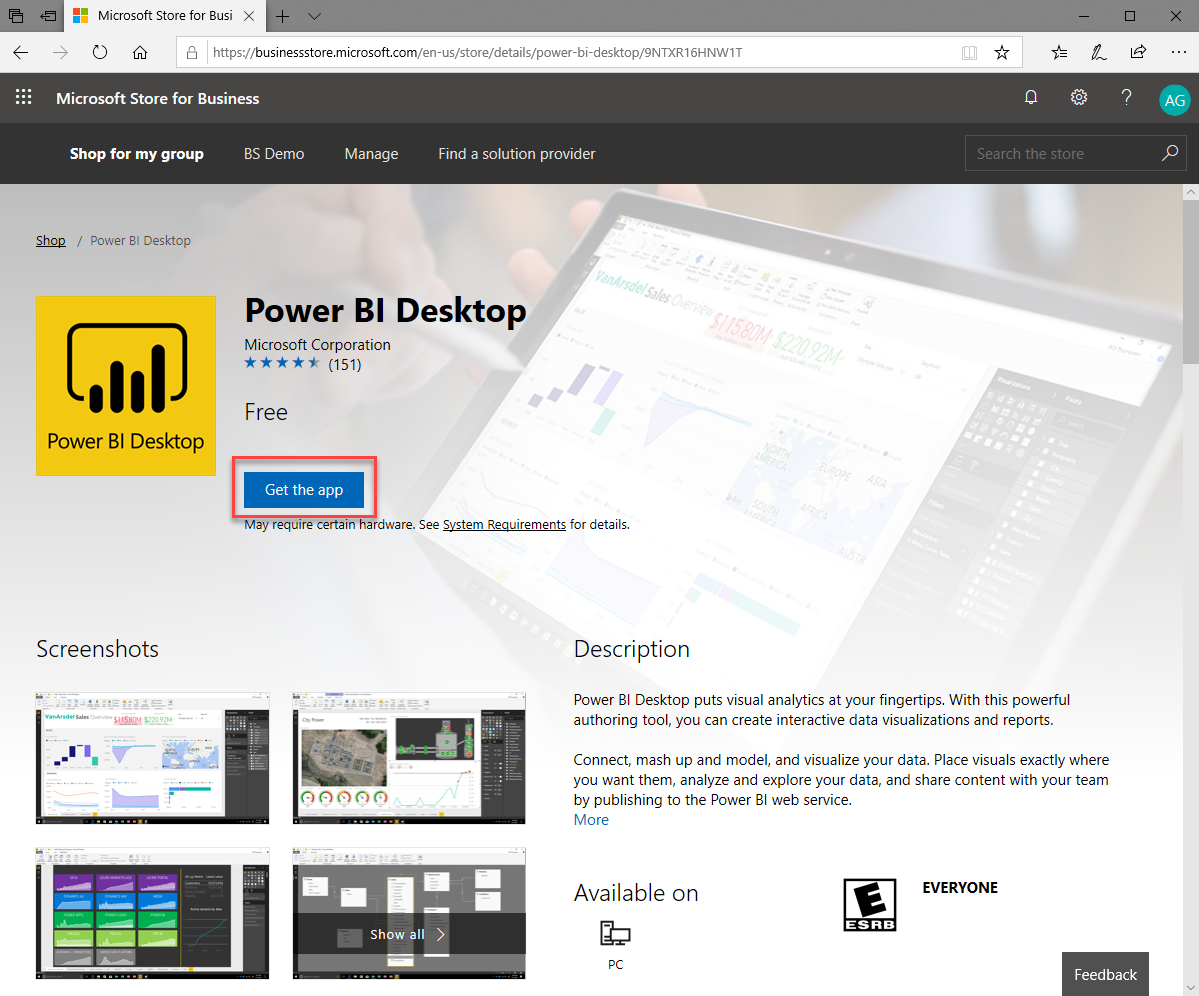
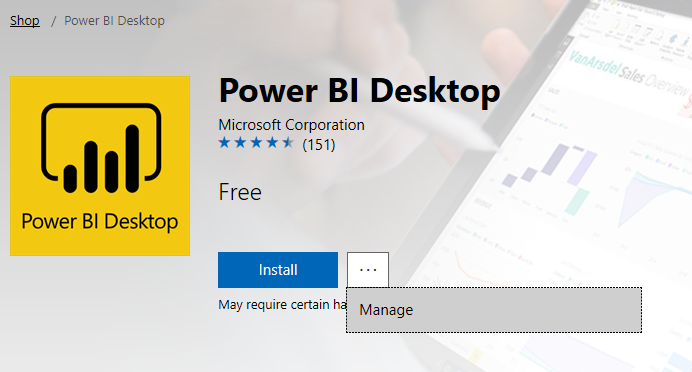
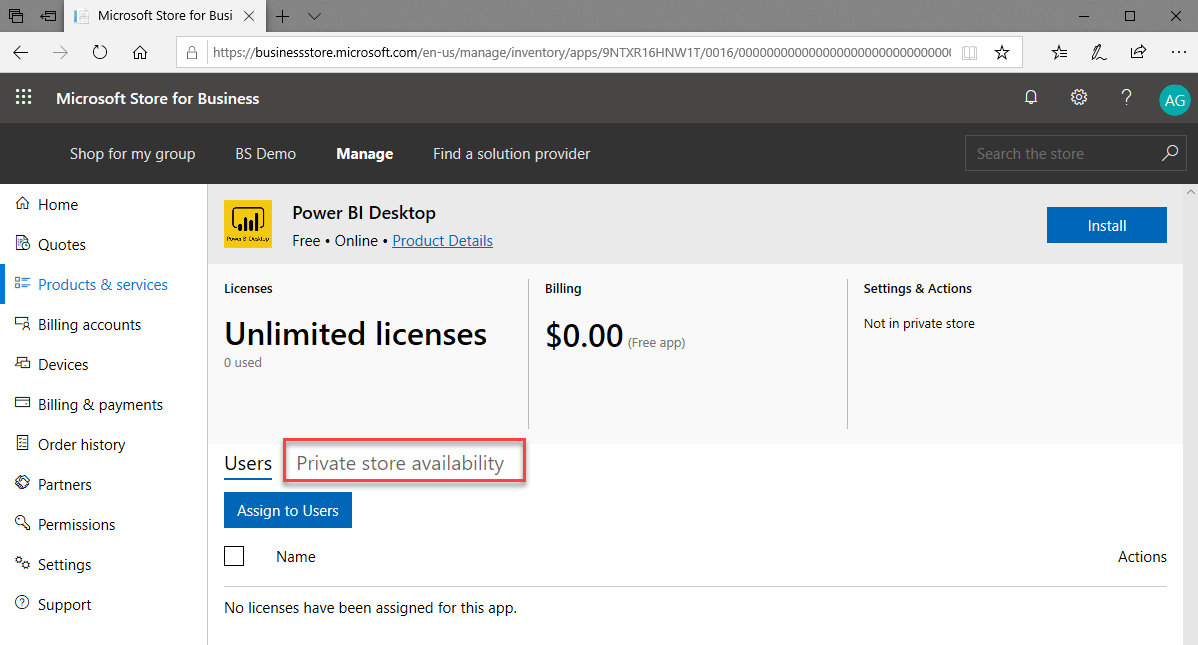
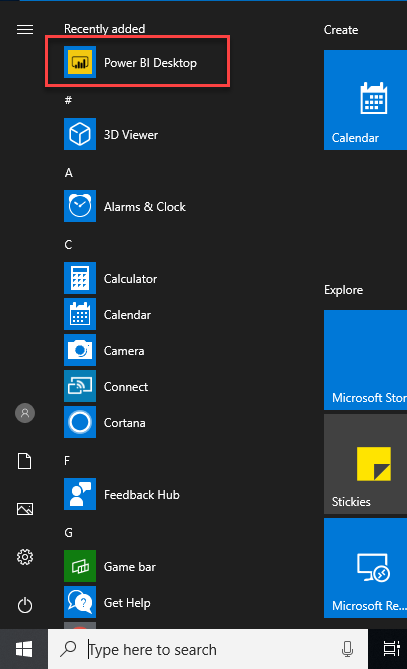
From your business store, search or browse for an application that you’d like to make available in your private store. In this example, I will select Power BI Desktop. On the product page, click Get the app. Note, for paid apps, you will need to provide additional information for the purchase.
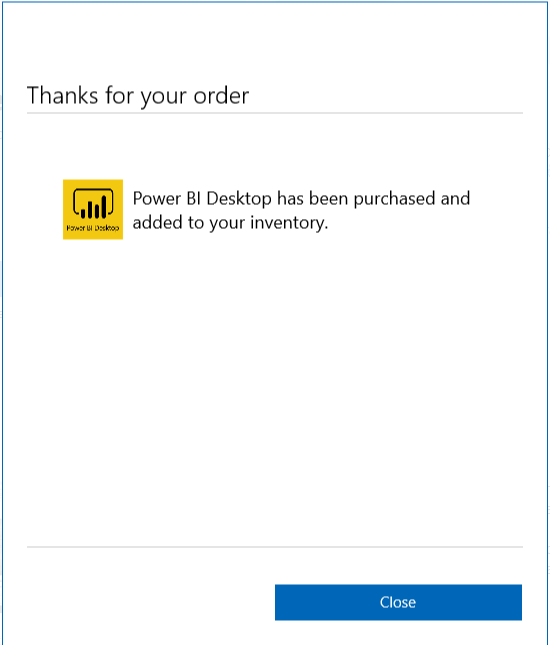
A confirmation message will appear. Click Close.
At this point, the application will appear in ConfigMgr on your next sync. To configure how it appears in your Private Store using the Windows Store app, select the … next to the Install button and click Manage.
Private Store vs Software Center vs Windows Store
This is where things get a bit tricky. Up until this point, I have walked you through how to set up a Business Store and connect it to ConfigMgr. Depending on your organizational needs, you can choose to configure one or more delivery options for apps. I’m no expert but will try to explain the difference.
Windows Store
This is the default consumer store that shows up when you install Windows 10. Don’t uninstall it as part of your operating system deployment or you’ll have to reimage to get it back! If you don’t want users to have access to applications in the consumer store, use group policies to manage it. There’s an option in ConfigMgr to create a Windows Store application and it depends on the consumer store being enabled. Just keep that in mind as you experiment with delivery options.

Private Store
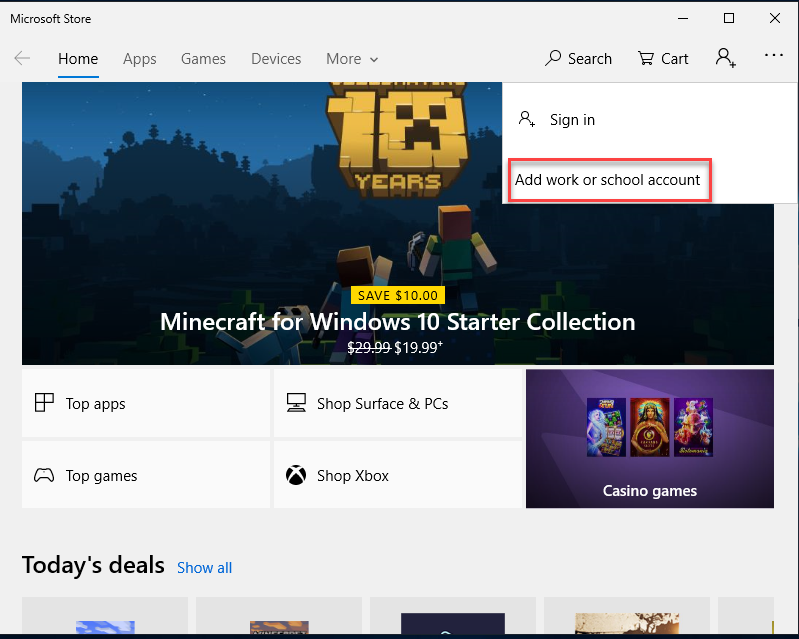
Once you enroll in the Windows Store for Business, your company’s Private Store is enabled and several applications are added to it by default. It can be accessed in Windows 10 by clicking the people icon and clicking Add work or school account.
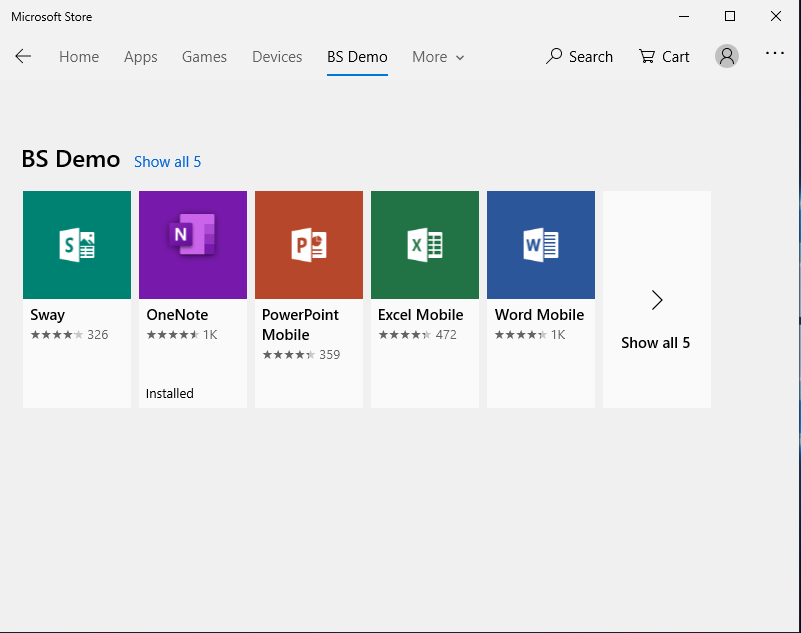
Once signed in, your store name will appear and users can see applications that they have access to.
You can use group policies to manage the Private Store as well, but you will also manage user access to specific applications and application groups through the business store portal.
Software Center
If you choose to fully disable the Windows Store application, you can deliver your Store for Business applications through your newly connected ConfigMgr web application and Software Center. The applications will appear in Software Center just like any other application and the interaction will be seamless to the user.

Online and Offline Apps
Whenever you ‘Get’ (free or paid) an application from the Business Store, you will have the option to choose an online of offline version of the application. Regardless of your delivery mechanism, online apps will auto-update using the store update engine. If you choose an offline version, you will need to manually manage any upgrades for that application. Online apps in ConfigMgr don’t require content, but offline ones do. Online apps will download content from the Store (internet) whenever the user chooses Install from Software Center while Offline apps will be delivered from your ConfigMgr DPs like other applications.
You can find more info here.
Creating and Deploying an Online Store App in ConfigMgr
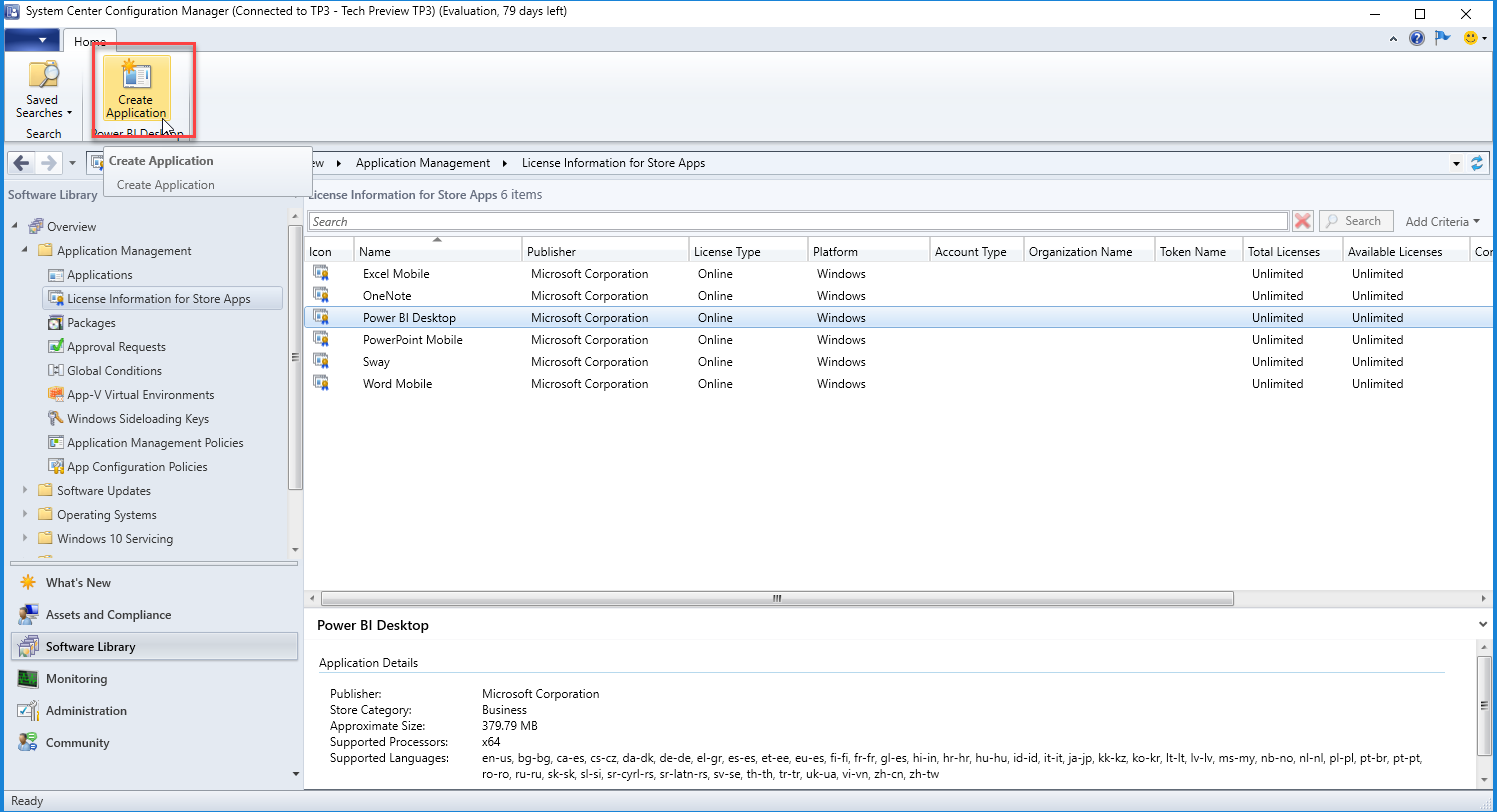
In the console, navigate to Software Library>Application Management>License Information for Store Apps. Select the application you want to deploy and click Create Application.
Click Next through the wizard unless you want to change anything. I always accept the defaults. Note: As of ConfigMgr 1902 CB, the icons for store apps do not get included with the app during this process. We spoke to the devs at MMSMOA and they are aware of this issue.
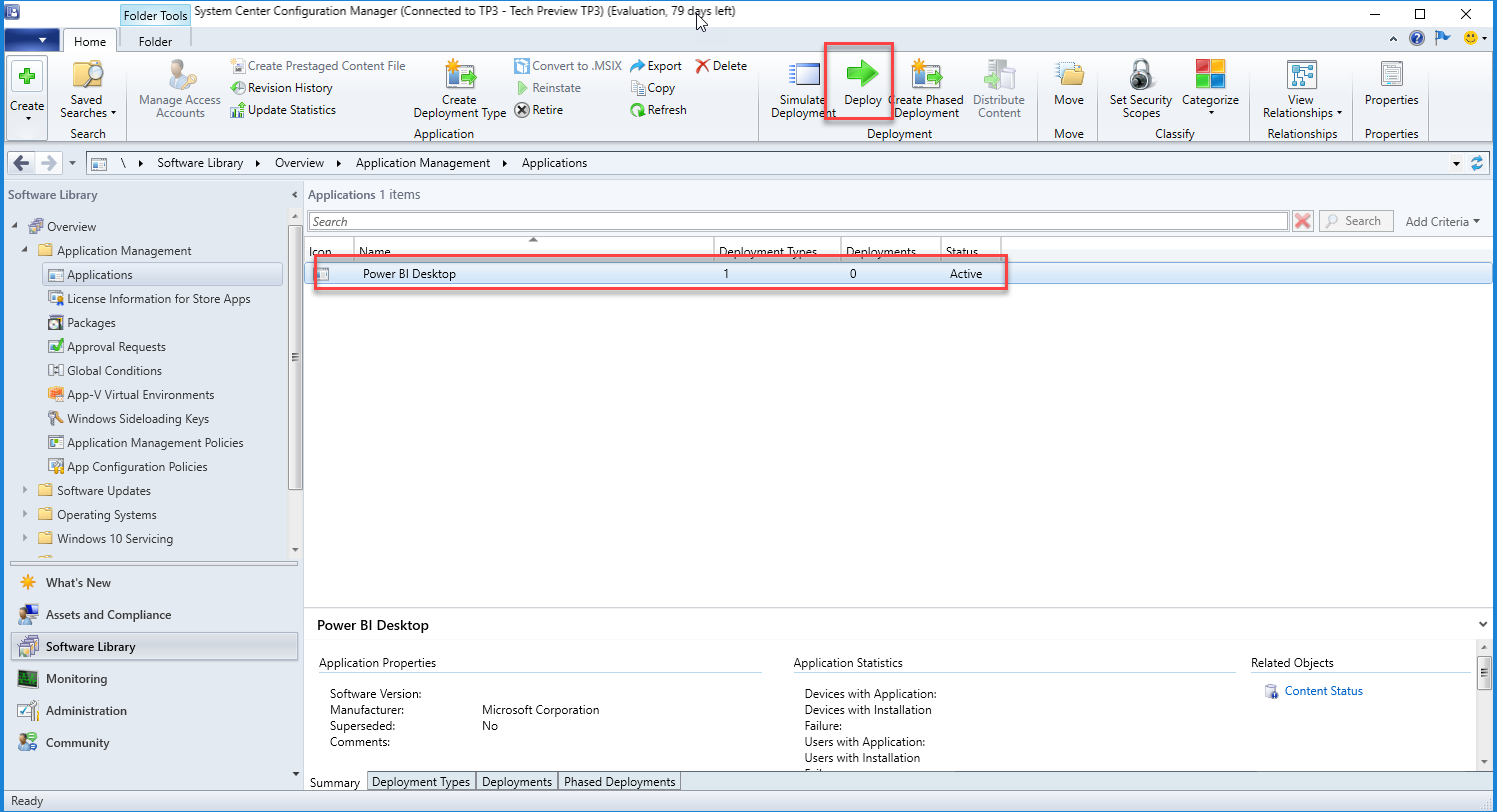
Navigate to Software Library>Application Management>Applications and you will find your newly created store app in the root. Select the app and click Deploy.
Deploy the app like any other application or package. You can select a Device or User collection - I prefer User collections.
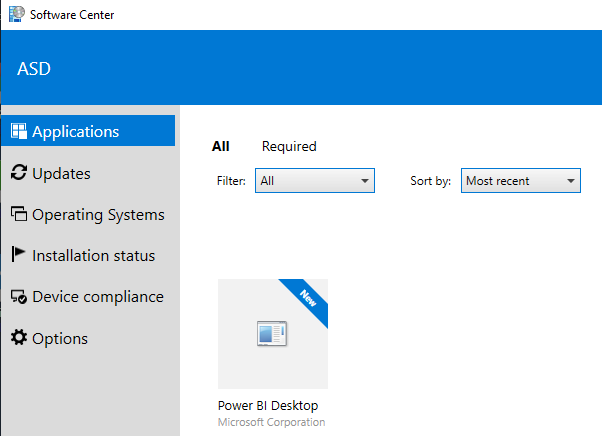
On a client machine, you can refresh policies and the application will show up as available to install.
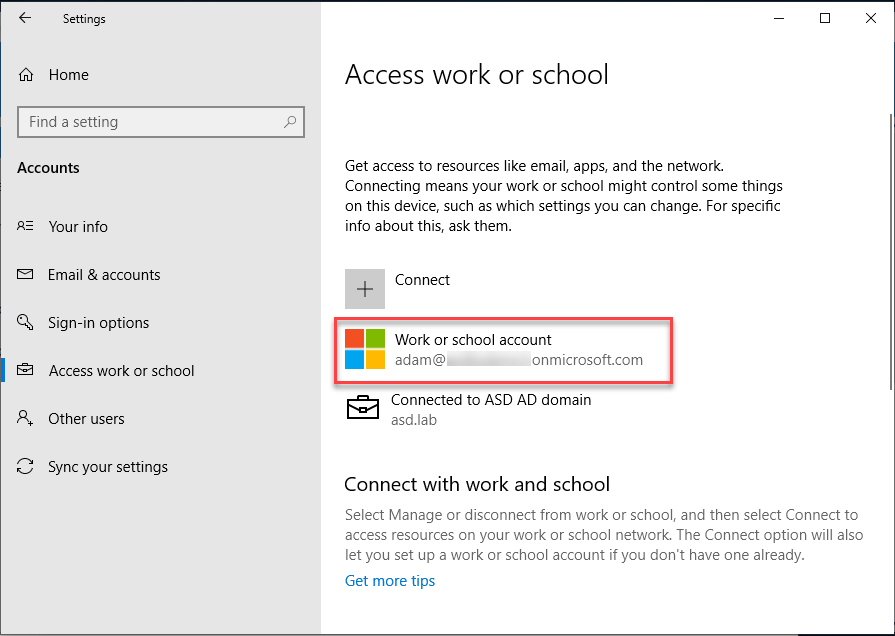
Before clicking Install, verify that your Work or School account has been linked to the device you are installing on. Open Settings from the Start Menu and click Accounts>Access work or school. If you don’t see your work or school account listed, you will need to click Connect to link it before the application will install properly. The symptom of the account not being linked is that the application will appear to install, but will not appear on the start menu.
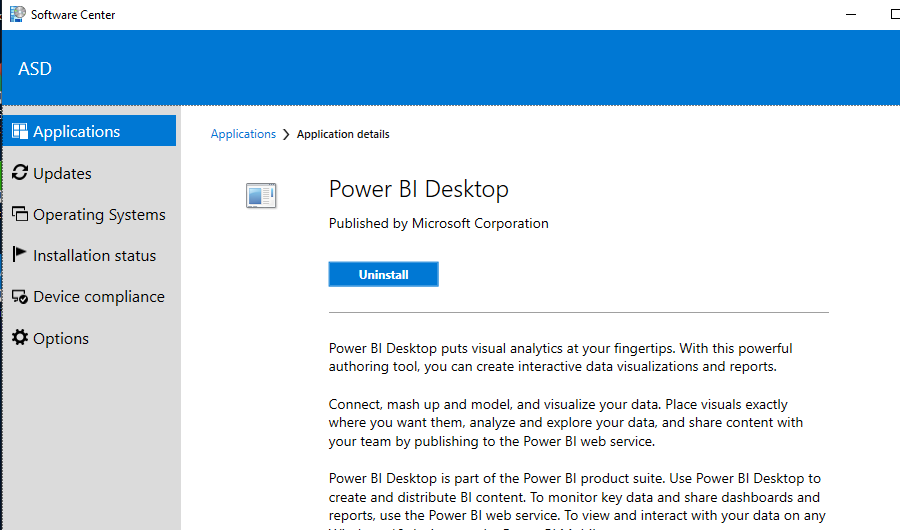
Once you have linked your work or school account, click Install in Software Center. You will see the Uninstall button appear once the installation is complete. Verify your installation by launching the application from the Start Menu.
To deploy an offline app, you’d follow the same steps. The only difference is that the offline content will be downloaded to your Store For Business share.
You can find more info here.
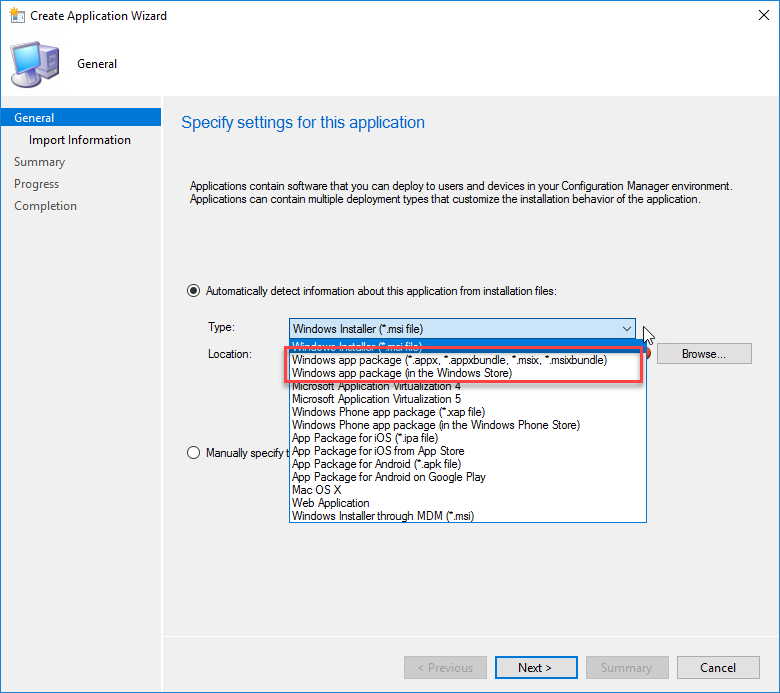
Other Deployment Options
As I mentioned earlier, in ConfigMgr, you can also use the Create Application wizard to add offline apps (.appx) and Windows (consumer) Store apps. These options can be found in the Create Application Wizard Type dropdown. I will not go into detail on these options in this post. I just wanted to mention them for completeness.
Summary
Assuming you have ConfigMgr working and don’t have an Azure tenant configured, you can have the Microsoft Store for Business integrated with ConfigMgr and have your first app deployed within 30 minutes or less. The trickier part will be ensuring that your user accounts are being synced to Azure using Azure AD Connect and that you have your sign-in and Store policies configured to allow all of the pieces to function properly. Hopefully this guide will help you get started quickly. The ConfigMgr docs contain great information on the process.