This is the next installment in my Windows 10 Feature Updates series.
Custom Actions
Beginning in Windows 10 1803, custom actions were introduced and represent what Suma SaganeGowda referred to as a ‘poor man’s implementation of Task Sequences’ at Ignite 2018 in session BRK3027. Windows setup will check for the existence of these special folders and scripts and use them as part of the Feature Update process. They allow you to run scripts at various stages in the Feature Update process as well as specify reflected driver paths just as you can in Setupconfig.ini. Like Setupconfig.ini, Custom Actions has limited documentation, but don’t let the lack of documentation fool you, Custom Actions are pretty cool. From the Microsoft Docs article:
Custom actions are .cmd scripts that run during the feature update process. These can be run during two phases of an upgrade:
- Pre-install phase: This phase is when Setup starts, but prior compatibility checks. Actions during this phase are specified in
preinstall.cmd.- Pre-commit phase: This phase is prior to the upgrade being applied and the system rebooting. Actions during this phase are specified in
precommit.cmd. https://docs.microsoft.com/windows-hardware/manufacture/desktop/windows-setup-enable-custom-actions
Folder Structure
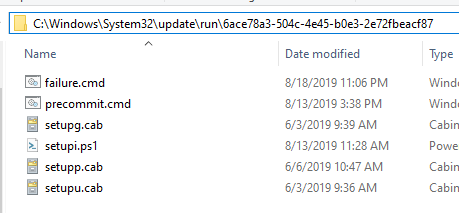
Custom Action folder structure includes run and runonce folders followed by a unique GUID folder and, if needed, a reflectdrivers folder. Your folders should look like this:c:\Windows\System32\update\run\<GUID>
c:\Windows\System32\update\run\<GUID>\reflectdrivers
c:\Windows\System32\update\runonce\<GUID>
c:\Windows\System32\update\runonce\<GUID>\reflectdrivers
The GUID is something that you generate is simply a unique identifier folder. I contacted the Feature Update team regarding the GUID folder and this is their explanation for it’s existence:
The purpose of the GUID folder is to enable multiple authors. For example, different software vendors that wish to extend setup, independent of each other. Or, I assume the same could be said for multiple departments in a large corp that wants some level of autonomy.
Note: My contact is confirming additional information regarding sequencing of the GUID’s/Scripts with engineering and I will update this post when I receive a response.
For the this post, I’m just using a single GUID folder that I created using PowerShell’s New-GUID command.
The key difference to note about the folders is that the run folder and it’s contents are all migrated during the Feature Update process, but the runonce folder is only used for a single Feature Update then removed during the upgrade process.
In the root of the run/runonce folders, you can include the following files to run actions at specific periods during the Feature Update process.
preinstall.cmdprecommit.cmdfailure.cmd
Since preinstall.cmd and precommit.cmd run before any files have moved, it is safe to include any supporting scripts in the run/runonce folders to be used by the cmd files. However, failure.cmd is copied to C:~Windows.BT\Sources\Scripts before the reboot and the supporting files may not be present in the original folders if the Feature Update fails before the OS migration has been fully completed. To remedy this, I ensure that whatever scripts I reference in failure.cmd are stored in a temporary directory outside of any system folders. I create the hidden folder C:\~FeatureUpdateTemp\Scripts and cache the files there for failure.cmd to reference.
Using these files in conjunction with Setupconfig.ini’s PostOOBE and PostRollback command line options, you can perform most just-in-time actions on your clients without using a task sequence.
Usage Example
If you’ve spent much time on my blog, you’ve probably noticed my posts around 802.1x and how to manage it during Operating System Deployment and InPlace Upgrades. As we began looking at Feature Update servicing, we once again needed to handle 802.1x. We are using my whitelisting solution in production today. In our InPlace Upgrade Task Sequence, we will run the script to whitelist a device just before the upgrade begins. This ensures that the device won’t be challenged by our NAC to re-authenticate during the Feature Update reboot cycles. Now with Feature Update servicing, we use precommit.cmd to run the whitelisting script just before the first reboot into the SafeOS phase.
To achieve this, we simply create the required folder structure C:\Windows\System32\Update\Run\<GUID> and include precommit.cmd and our whitelisting script in the folder. Whenever the Downlevel phase is complete, it will run precommit.cmd and launch the PowerShell whitelisting script. Setup doesn’t check for success or failure, so be sure to include good error handling and logging with any of your scripts.
Sample Scripts
To deploy the files to the correct locations, I have another PowerShell script that we deploy as an Application in SCCM that will copy everything down. There’s nothing special about the Application model, I just like using it. 🙂 You can download the scripts from my repo https://github.com/AdamGrossTX/Windows10FeatureUpdates. You will need the following files:
Copy-FeatureUpdateFiles.ps1Trigger-DCMEvaluation.ps1(optional)\Admin\Generate-CMDFiles.ps1\Update\failure.cmd\Update\precommit.cmd\Update\preinstall.cmd\Scripts\Process-Content.ps1Update
Copy-FeatureUpdateFiles.ps1with your newGUIDandTempDirPath(C:\~FeatureUpdateTemp** is the default).Copy-FeatureUpdateFiles.ps1is configured to run the setupconfig.ini baseline (see previous post) if you specify the name of the baseline in the$BaseLineNameparameter.
Update and Run
Generate-CMDFiles.ps1to build any cmd files that you want to include. It’s just an easy way to update your cmd files in the same way each time.Create a new application and add these files & folders in as your source content (you can exclude the Admin folder from the source). * Install:
Powershell.exe -ExecutionPolicy ByPass -File Copy-FeatureUpdateFiles.ps1- Repair:
Powershell.exe -ExecutionPolicy ByPass -File Copy-FeatureUpdateFiles.ps1 - Uninstall:
Powershell.exe -ExecutionPolicy ByPass -File Copy-FeatureUpdateFiles.ps1 -RemoveOnly - Detection Method
- Folder Existence rule:
C:\Windows\System32\Update\<GUID>where<GUID>is your new custom GUID specified in the scripts. - Folder Existence rule:
C:\~FeatureUpdateTemp\Scripts
- Folder Existence rule:
- Deploy the application to your target devices and verify that the files and folders are correctly created.
- Repair:
Error Handling
I have another post planned for SetupComplete.cmd and Failure.cmd which will fully cover these files. The GitHub repo contains everything you need to build everything out fully, there are just a lot of moving pieces to write up for the full picture here. Ultimately, you can use failure.cmd to run any post-failure script you would like.
Summary
If you have a need for pre-install and pre-commit actions that need to be triggered just-in-time as well as a way to handle failures, you should take a look at Custom Actions. They work very well! More to come on these in a future post.