This is the next installment in my Windows 10 Feature Updates series.
Setupconfig.ini
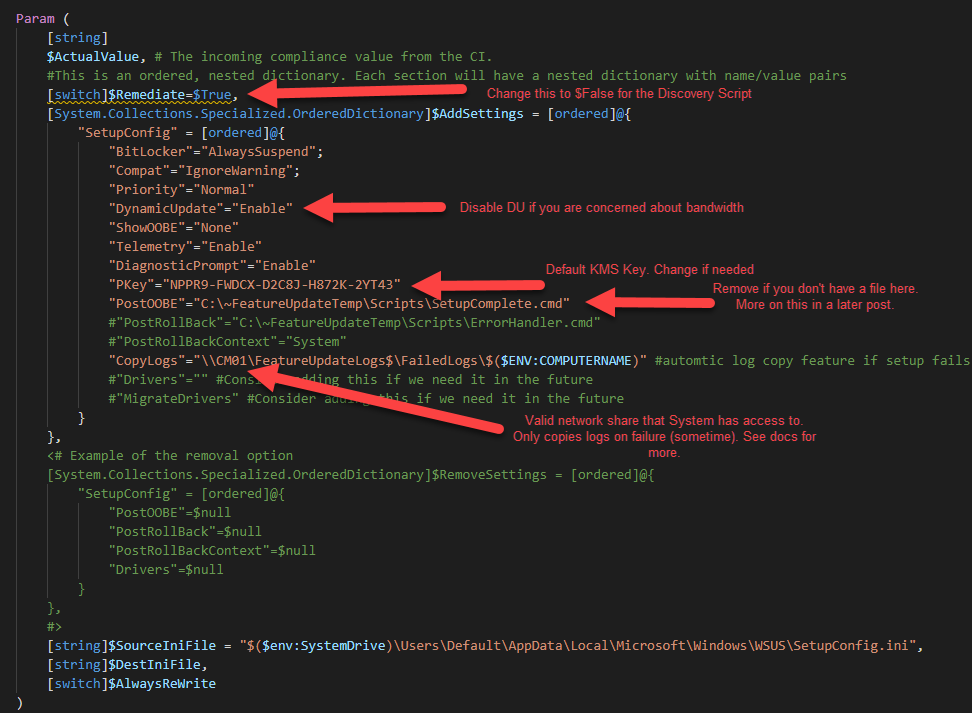
Setupconfig.ini is a file that can be used to pass command line arguments to the Windows Setup engine during a Windows installation. When Setupconfig.ini is specified in the command line (/ConfigFile <path to Setupconfig.ini>) or exists in the default location (%systemdrive%\Users\Default\AppData\Local\Microsoft\Windows\WSUS\Setupconfig.ini), any arguments in it will take precedence over arguments specified in the commandline. If you use this file, ensure that you aren’t counteracting commandline args that you may be using with other deployment methods such as Task Sequences (Task Sequences simply generate a command line based on which options you select). Here’s an example of the Setupconfig.ini that I have been testing in production (most people will not use all of these).
| |
If you were to change this to a Windows setup command line, it would look like this:
| |
By managing a Setupconfig.ini file on all of your Windows 10 devices, you can have full control of how Windows 10 Feature Updates are installed, from Task Sequence, Intune, WSUS or even if users install them directly from Windows Update. By using the available command line options, you can run post-upgrade scripts, apply updated drivers and even handle third party disk encryption needs (see ReflectDrivers). Before deploying this file, be sure to check the Windows Setup Command-Line Options doc for details on each option. After testing several versions of it, the one I deployed into production is different than above. Some of the options deserve a bit more explanation:
Compat=IgnoreWarning
If you have dealt with Windows 10 upgrades (7-10 or 10-10 Feature Updates) you have likely run into blocks due to drivers or applications. Many of these blocks can be ignored but only if you include /Compat IgnoreWarning in command line either using media or a Task Sequence. If you’ve ever tried to apply a Feature Update from Windows Update or through SCCM’s Windows 10 Servicing, you have likely run into blocks that prevented you from upgrading certain devices that would have otherwise worked fine from a Task Sequence using the /Compat IgnoreWarning argument. You can just add the line Compat=IgnoreWarning to your Setupconfig.ini now and breeze right past those annoying blocks.
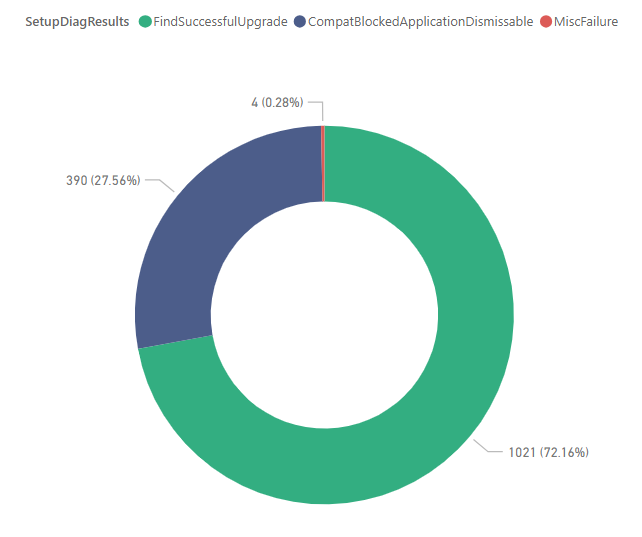
When we first started testing Feature Updates, we were seeing a high number of failed upgrades compared to our InPlace Upgrade Task Sequence and nearly all of them ended up being dismissable compat issues. Once we added Setupconfig.ini, our failures were almost non-existent. In the donut chart below you can see that over 27% of devices reported dismissable errors and were successfully upgraded since we are using the Compat=IgnoreWarning option.
DynamicUpdate=Enable
Another one that really deserves it’s own blog post some day is the change in Dynamic Updates in Windows 10 1809 and up. Several of us in the community have been writing and speaking how important Dynamic Updates are for successful upgrades but in Windows 10 1809 the mechanism for applying Dynamic Updates changed. As you may have read recently on Michael Niehus’s blog on the topic, Dynamic Updates can ONLY be pulled from the internet currently and are ENABLED BY DEFAULT!! Delivery Optimization and BracheCache don’t help either. Your clients may download large amounts of data (Latest Cumulative Update, Dynamic Updates, Etc) directly from the internet if you leave Dynamic Updates enabled.
Interestingly, while this change has made it much more difficult to offline service your Windows 10 Upgrade media, it is what has helped make Feature Updates using native servicing work, but ONLY if you leave Dynamic Updates enabled.
Regardless of where they come from, Dynamic Updates still are an integral part of the Feature Update process. You can disable Dynamic Updates using DynamicUpdate=Disable, but then you MAY run into issues that Dynamic Updates would have addressed for you (we have seen it in our testing). The choice is up to you. If you have concerns about melting your networks, please proceed with caution and test before rolling this out work with your networking team if you before you enable it. If you’re thinking that since you are offline servicing your Windows 10 Upgrade media for your SCCM Task Sequence, you’ll just keep using that — the ‘feature’ that causes Windows Setup to go out to the internet for Dynamic Updates is also what has removed them from WSUS (though we just had 1 show up in WSUS or 1809 last month) and has made it difficult (not impossible) to continue to include them in our offline serviced media. Additionally, you should know that if you are deploying 1809+ via Task Sequence, you may ALREADY be downloading updates from the internet without knowing it since this is a default behavior now (more info in the next section).
Deploying/Managing Setupconfig.ini
Depending on your needs, you can deploy Setupconfig.ini any number of ways including:
- Static file copied down via:
- GPO
- SCCM Package or Application
- Logon Script
- etc
- SCCM Client Settings - Limited Use (see screenshot below)
- Priority (1902)
- Dynamic Updates (1906)
- SCCM Task Sequence
- Detect model and cache drivers
- Build Setupconfig.ini based on device requirements
- SCCM Application or Package
- SCCM Configuration Item (CI) and Configuration Baselines
- Detect and enforce settings by line
- Add/Remove/Update lines without impacting lines managed by other means (like SCCM Client Settings)
- Intune PowerShell Scripts or Win32 Application
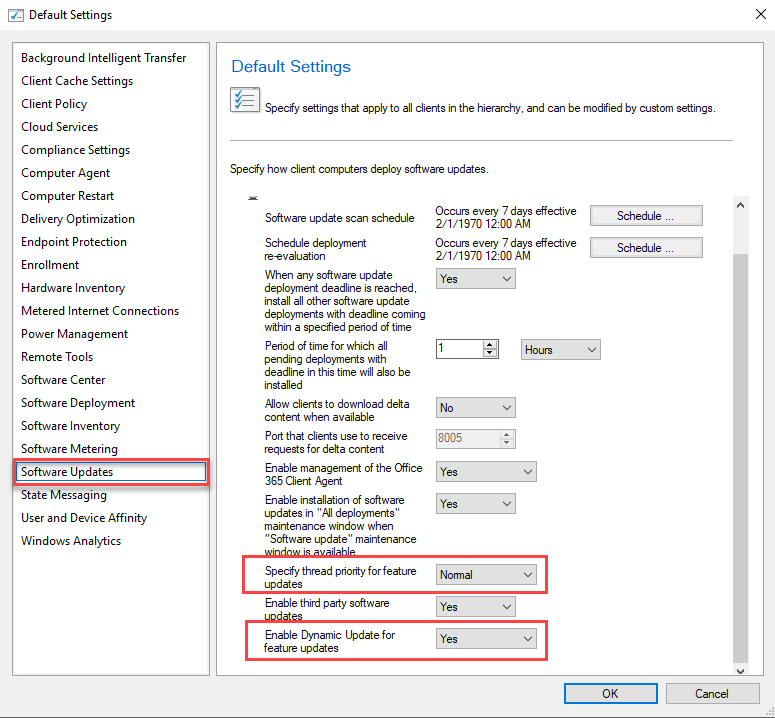
SCCM Client Settings
New Client Settings policies have been added to SCCM 1902 and 1906 that modify Setupconfig.ini to change priority for Feature Updates from Low to Normal (speeds up the downlevel portion of the upgrade) and disable Dynamic Updates. If you want to customize Setupconfig.ini, consider whether you will also be using these client settings. If so, you need to ensure that you aren’t overwriting the file with whatever process you use to maintain the file.
SCCM Task Sequence
At the August 2019 Charlotte Systems Management User Group hosted by Microsoft PFE Julie Andreacola, she detailed how to deploy a Task Sequence that can customize the file based on device type and driver requirements. If you have driver requirements, this could certainly be a viable option. If you don’t it may be a bit complex when a simple file copy will work for you.
SCCM Configuration Item (CI) and Configuration Baselines
The approach I’m taking is using an SCCM Configuration Item and Configuration Baseline to manage the Setupconfig.ini file, as well as several other scripts/files needed by Windows Setup. The CI uses a PowerShell script that will read in the contents of the existing ini file and only edit the lines specified by the remediation script. This allows the script to play nicely with other processes such as SCCM Client settings that may also be managing the file. There will be a link to my whole Feature Updates GitHub repository at the end of the post. No matter which approach you take to managing Setupconfig.ini, be sure that it can handle the complexities of your environment. Start simple and work up from there. My scripts have ended up a bit more complex than I expected, but I took the time to make them re-usable for other things in the future. You can certainly simplify them if you need to. https://docs.microsoft.com/microsoft-365/enterprise/step-7-windows-and-office-as-a-servicehttps://docs.microsoft.com/windows/deployment/update/waas-quick-start
Errors caused by Setupconfig.ini
During testing of Setupconfig.ini, some of my tests were failing with random errors right away. Here’s what I found.
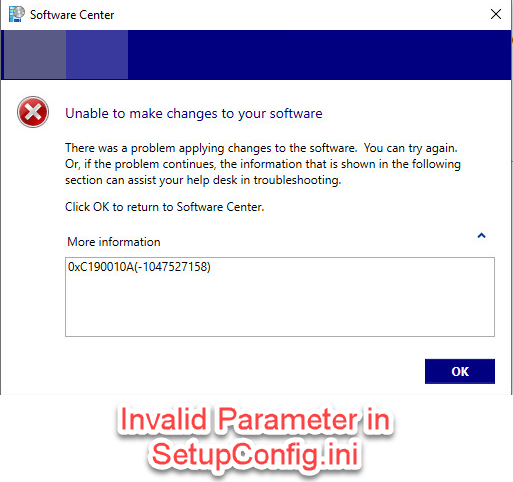
0xC190010A(-1047527158)
This error occurs whenever you have line items in your Setupconfig.ini file that aren’t valid command line options. This is typically a typo or incorrect entry in the Setupconfig.ini file.
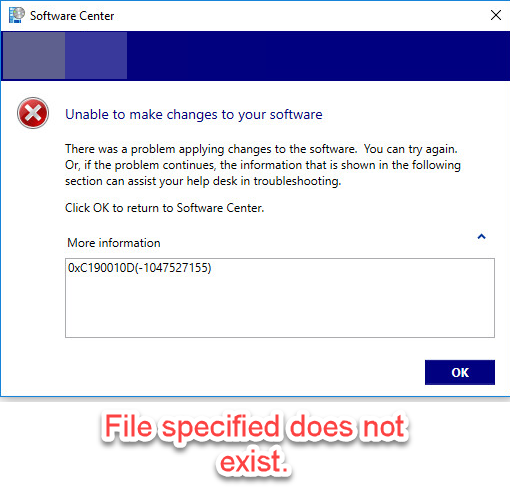
0xC190010D(-1047527155)
Some entries in Setupconfig.ini are paths to files such as PostOOBE=c:\~FeatureUpdateTemp\Scripts\SetupComplete.cmd. Any files you specify must exist at the time that you launch the Feature Update, or you will receive this message.
You can run ProcMon from the SysInternals suite to track down issues like this. I was able to quickly determine that SetupHost was looking at Setupconfig.ini then looking for SetupComplete.cmd and returned File Not Found.

Script for Managing Setupconfig.ini
As I mentined above, I’m managing Setupconfig.ini in production using an SCCM Configuration Item and Baseline. In my Windows10FeatureUpdates GitHub Repo, I’ve included the script that I wrote to manage the file. Thanks to Colin Wilkins for helping me get started with the script and CI (see the original here). To use this file in production, you will set up a Configuration Item and Baseline in SCCM. The script will perform the Detection and Remediation all in one.
Before you start, download the script from my Github Repo. It is located under Admin\ComplianceScripts\FeatureUpdateCIScript.ps1
Edit the parameters of the script to match settings required for your environment. Here’s a snippet of the params. Read the help in the script for more info. You will use this script in Steps 4 & 5 below.
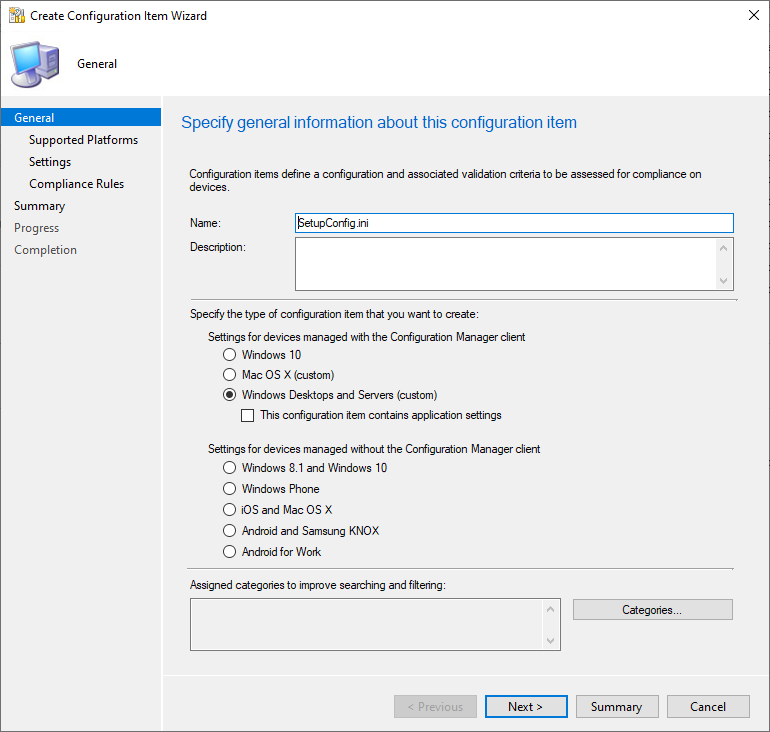
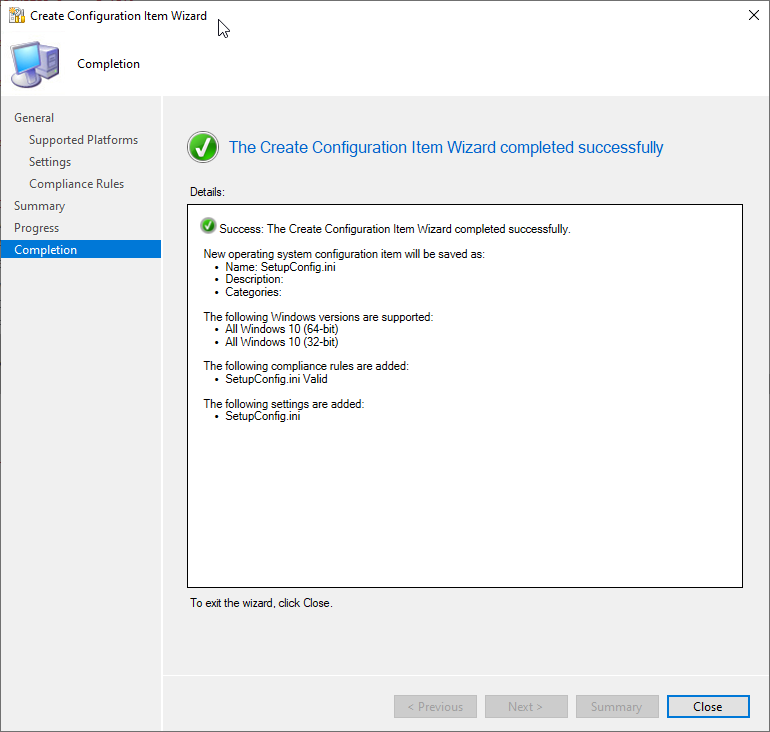
In the SCCM Console under \Assets and Compliance\Overview\Compliance Settings\Configuration Items, Click Create Configuration Item and enter a new name for the CI then click Next.
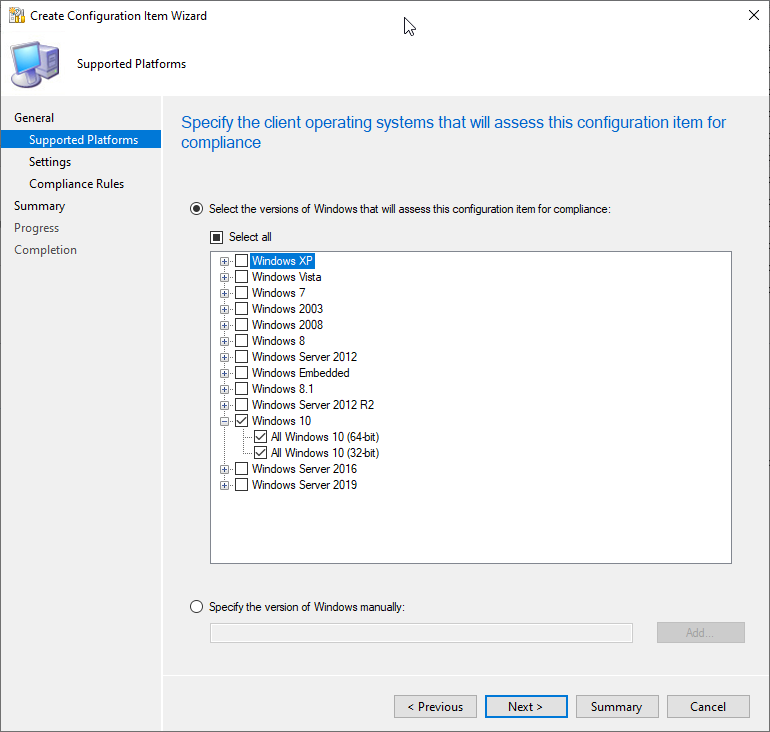
For Supported Platforms click Windows 10.
On Settings click New then Enter the following:
- Name: Setupconfig.ini
- Setting Type: Script / Data Type: String
- Discovery Script - Click Add Script and paste the contents of the script from the repo. Ensure that the $Remediate variable in the is set to $Remediate=$False
- Remediation Script - Click Add Script and paste the contents of the script from the repo. Ensure that the $Remediate variable in the is set to $Remediate=$True
- Click Compliance Rules.

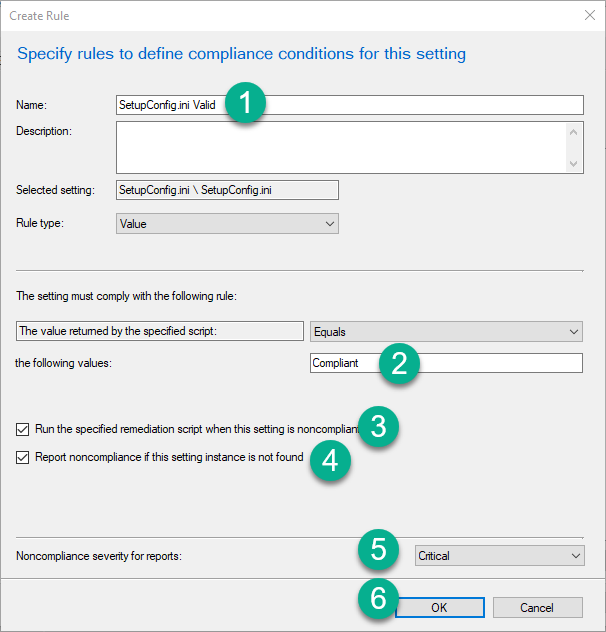
Click New. In the Create Rule Pane enter the following:
- Name: Setupconfig.ini Valid
- The setting must comply with he following rule: Compliant
- Check the box
- Check the other box
- Noncompliance set Critical
- Click OK.
Click OK again. You should be back at the main wizard. Click Summary, Next, Close.
Next we you need to create a new Configuration Baseline and select the new CI that you just created (Just follow the wizard). Then deploy to a collection of your Windows 10 devices that you expect to manage with Feature Update servicing.
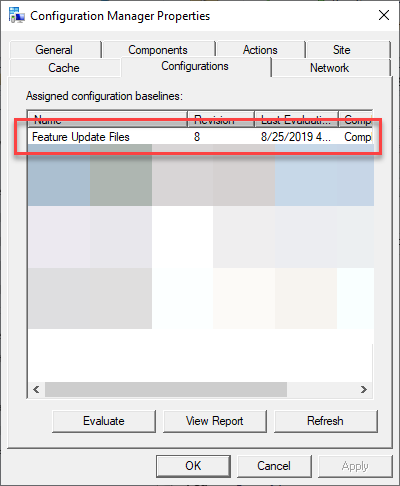
Clients will get the baseline whenever they check in for new Machine Policies. You can manually launch the baseline from the Configuration Manager applet. My baseline is named Feature Update Files.
When you run this on a client, you should see a new Setupconfig.ini file appear on the client under C:\Users\Default\AppData\Local\Microsoft\Windows\WSUS\Setupconfig.ini.
Summary
I know there’s a whole lot of information in this post which may make Setupconfig.ini seem complicated, but I assure you that it is very simple to use - I just chose to complicate it because I wanted a very dynamic management option for it. As I mentioned, you can simply create a new Setupconfig.ini file with the minimal set of options and copy it to C:\Users\Default\AppData\Local\Microsoft\Windows\WSUS\Setupconfig.ini on your clients. The thing that I like most about this file is that it works no matter where the Feature Update is deployed from (Task Sequence, WSUS, Intune, Windows Update). In my future posts, I’ll show you how I’m managing the SetupComplete.cmd and Failure.cmd files to help gather logs and integrate with SetupDiag. Stay tuned.