I demoed this at MMS Jazz 2019 Tip and Tricks. This is Part 3 of a 3-part series. Part 1covers how to create a PowerShell script to lookup error messages. Part 2 covers creating an Azure Function.
My goal is to use ConfigMgr ErrorCodes in a report in Power BI for easier deployment monitoring. As I mentioned in Part 1, the error text isn’t available in the ConfigMgr DB, so I created a PowerShell script to look up the error code. In part 2 I added the PowerShell to an Azure Function to leverage a web API to look up the information. In this post, I’ll show how to integrate an Azure Function into Power BI and how to create a Power BI function to look up values. This post will rely on Part 1 and Part 2 for content.
Adding an Azure Function as a Data Source in Power BI
Open a new blank report in Power BI Desktop.
- Click Edit Queries
- Click Manage Parameters
- Click Manage Parameters
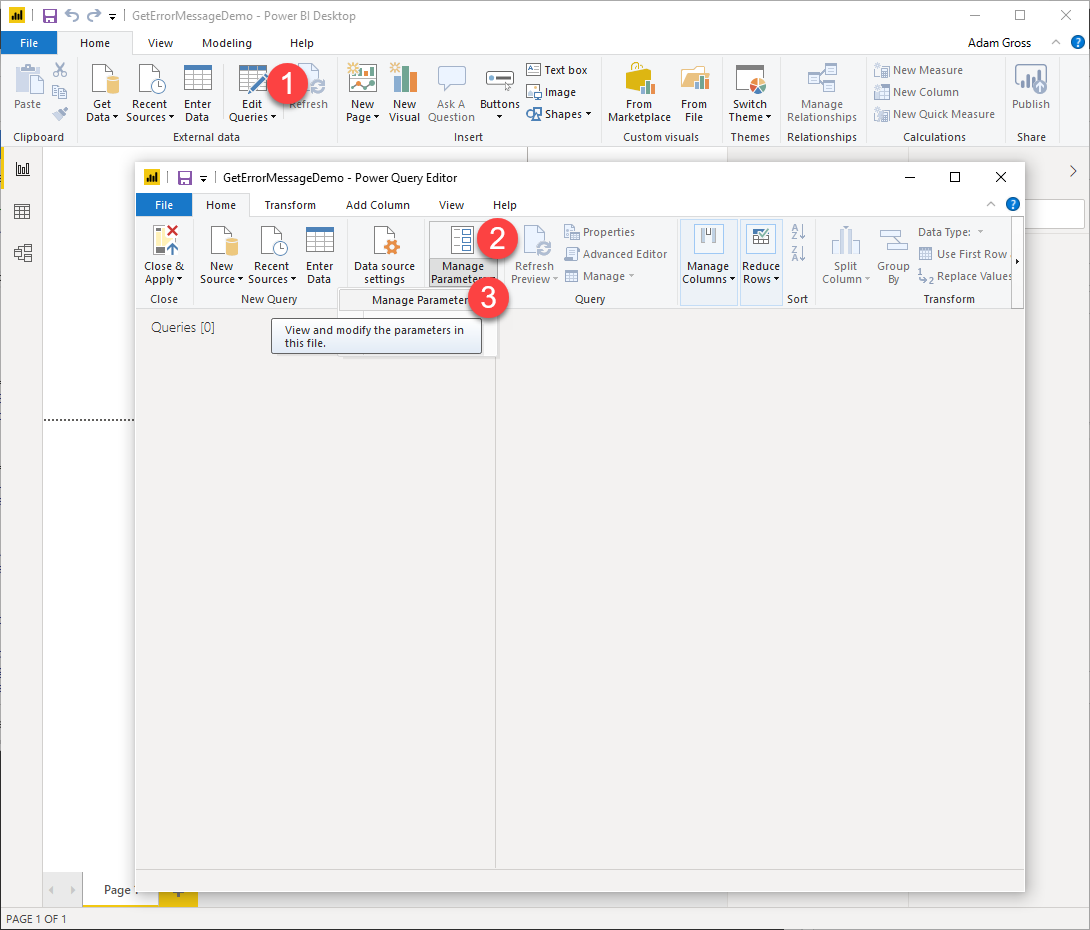
- Click New
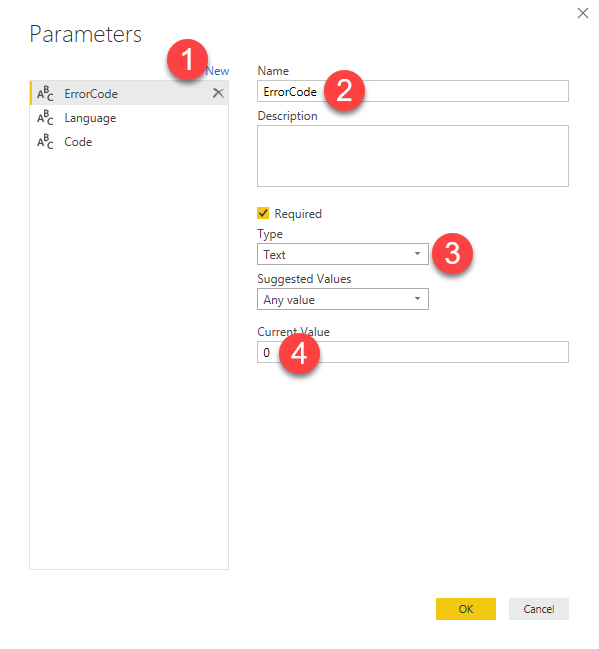
- Type
ErrorCode - Select type
Text - Enter `` as Current Value
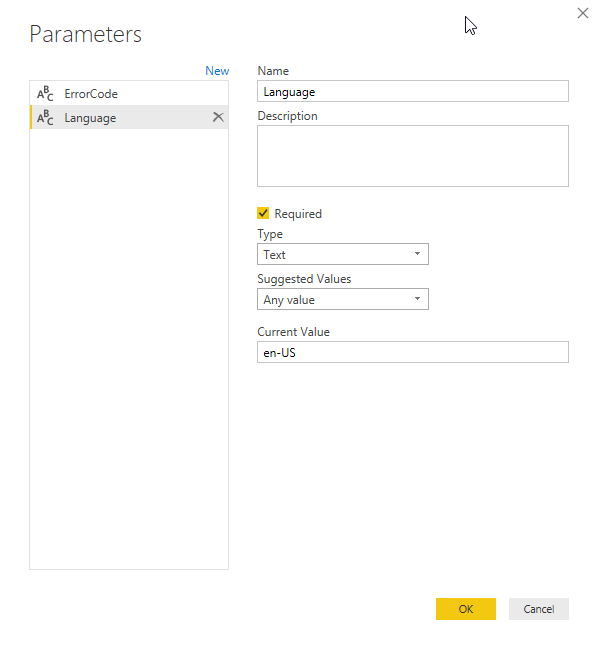
Repeat for Language
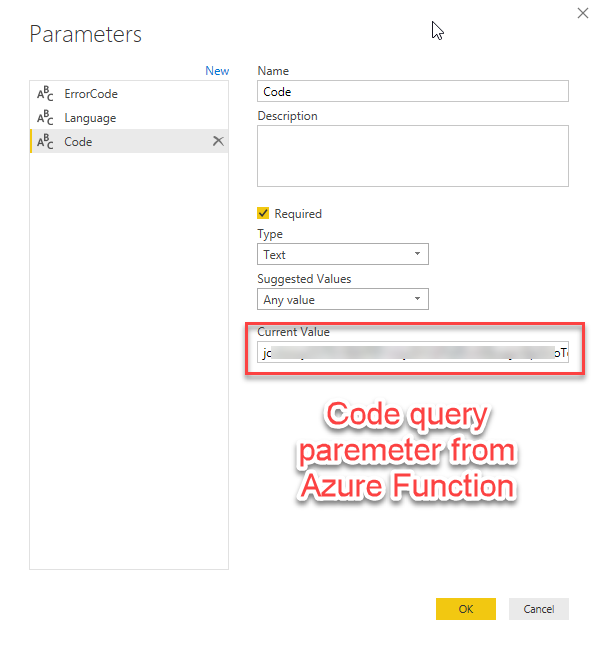
Repeat for Code. Code will store the function code from the Azure Function that was created in Step 2.
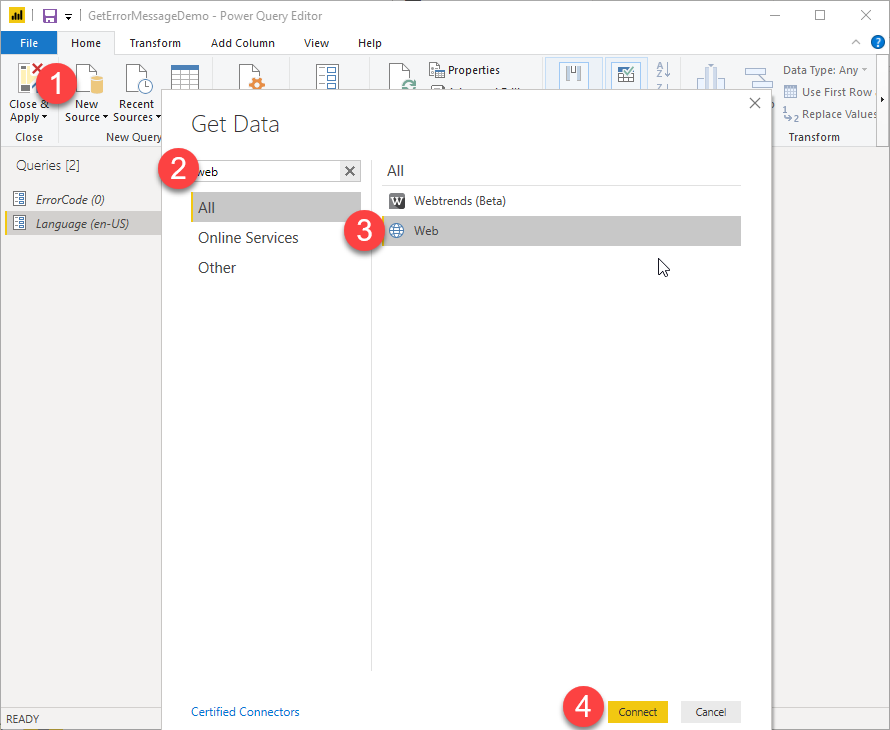
- Click New Source
- Search for
web - Click Web
- Click Connect
Click the Advanced radio button in the new dialog. This will allow you to enter the web URL to the Azure Function that you created in Part 2. Then using the new Power BI parameters that you created. The items in order are as follows (for the screenshots, I had to scroll…) :
- Base URL
- QueryParam -
&ExitCode= - Value - Power BI
ExitCodeParameter - QueryParam -
&Language - Value - Power BI
LanguageParameter
Click OK when done.

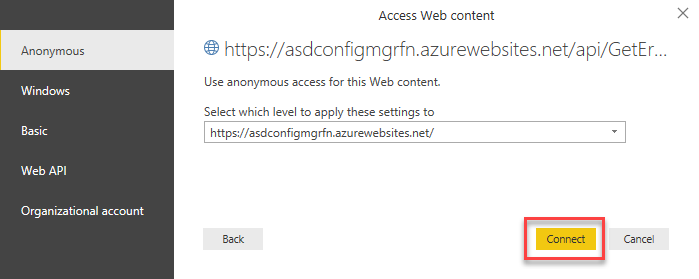
You will be prompted to change permissions for the API. Since we are using the Code query parameter, we can just use Anonymous and click Connect.
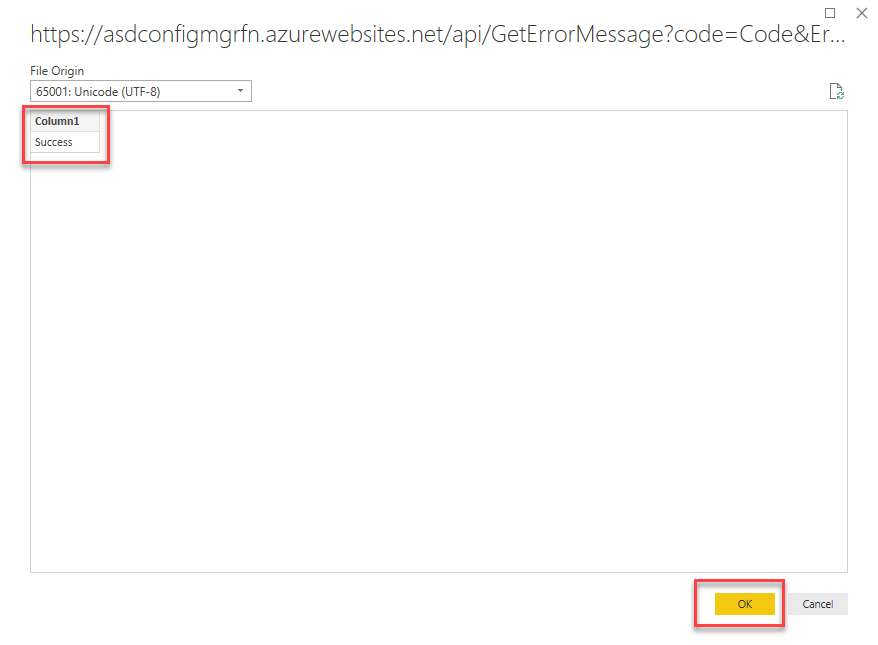
You will get a confirmation showing the first result from the function.
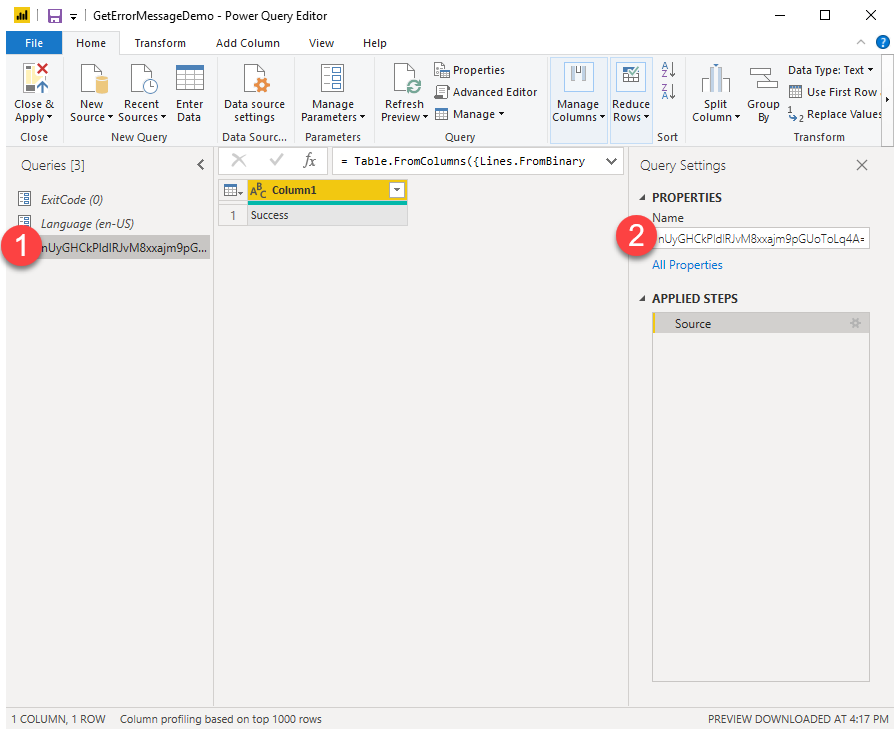
The new data source may be labeled using the code. Rename the function.
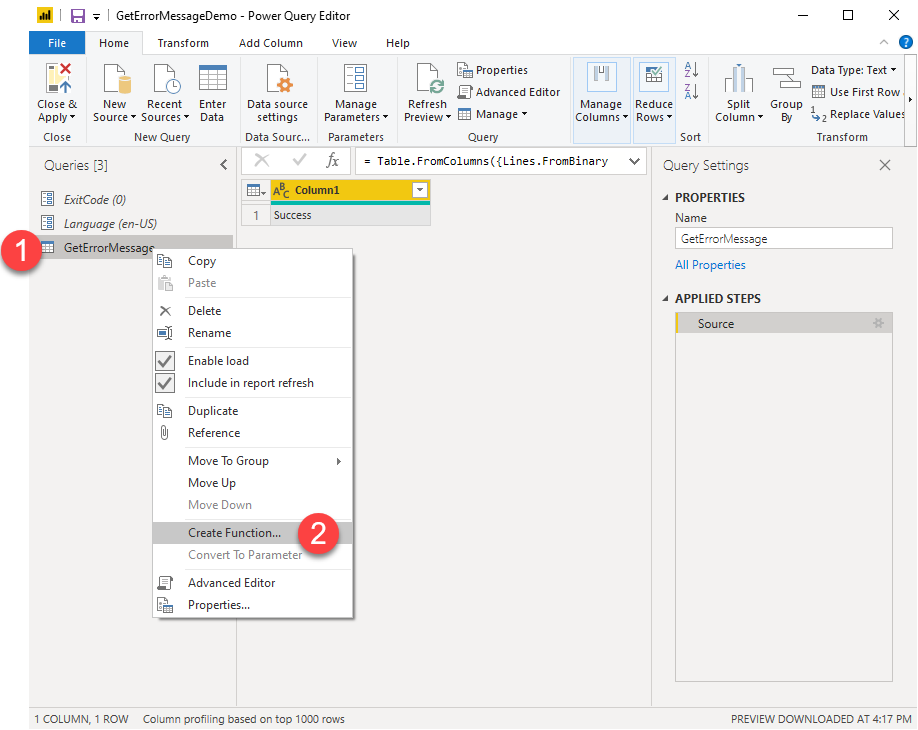
Right click on the GetErrorMessage query from the right pane and click Create Function
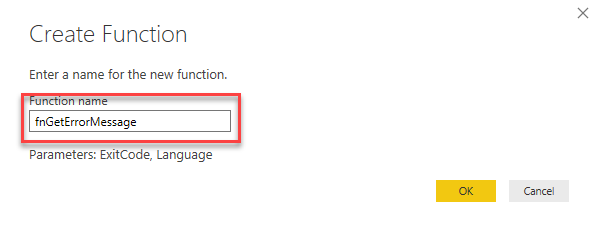
Give the function a unique name
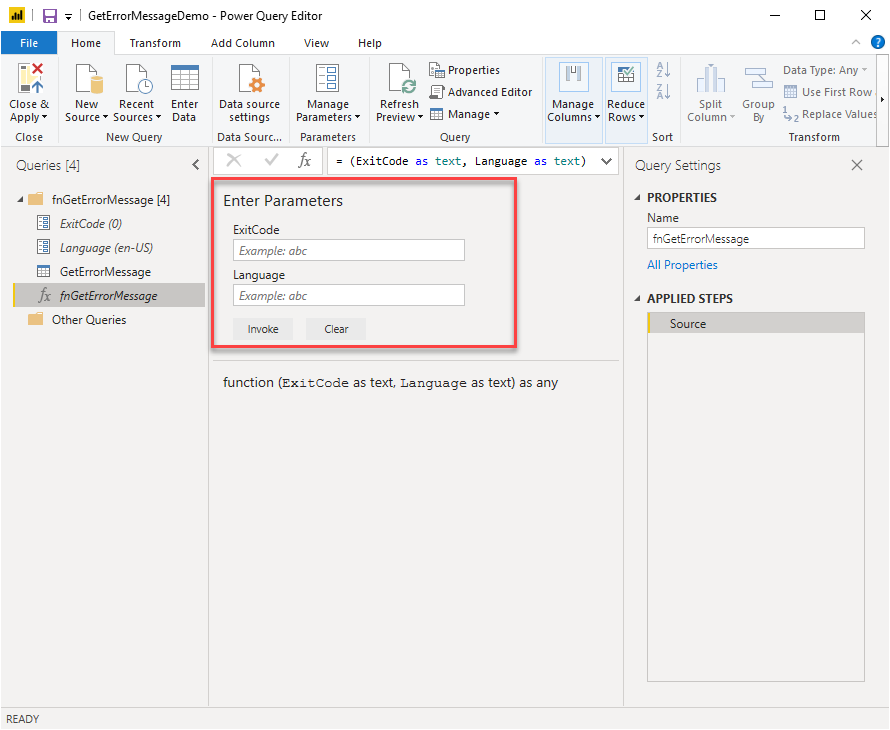
The new function will be shown and prompt for the ExitCode and Language parameters
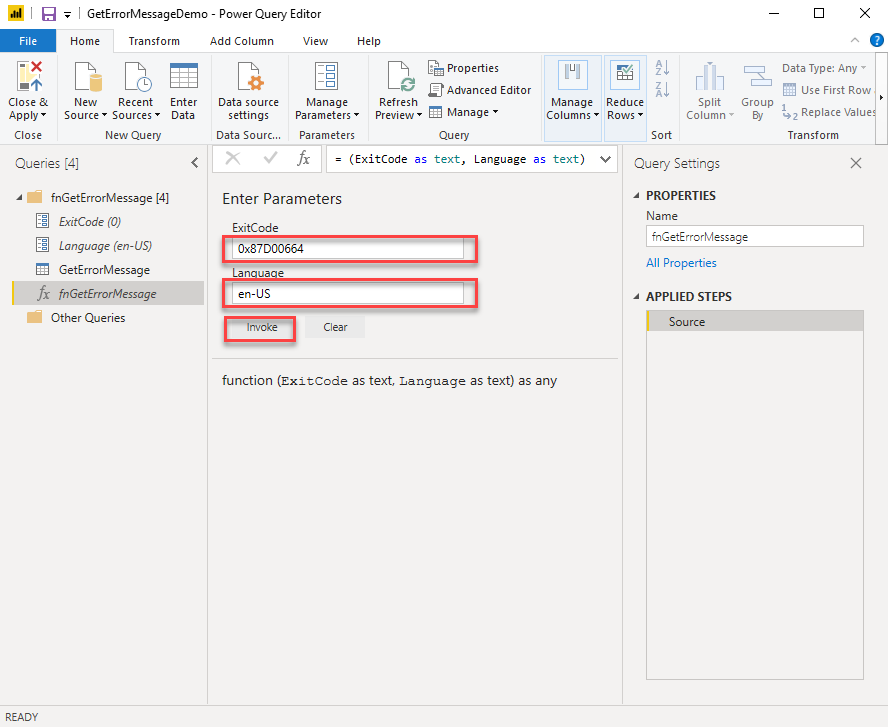
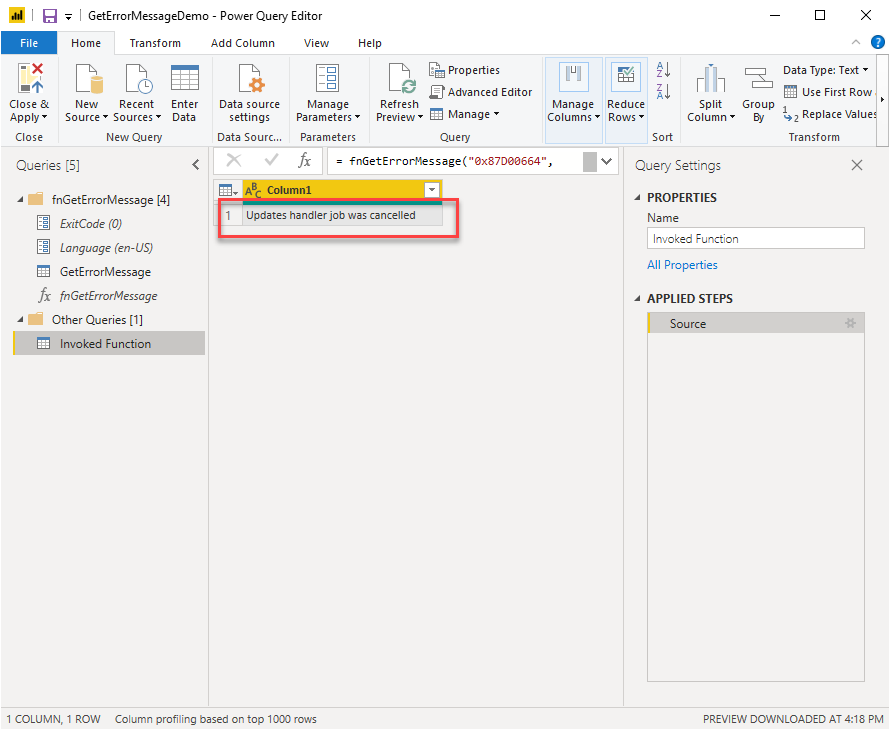
Enter an exit code 0x87D00664 and language en-US then click Invoke to test
If you did it right, you should get the results shown below. Once you’ve verified, right click on the Invoked Function results data set and delete it since it’s just a temporary data set.
Integrating a Power BI Function with a SQL data source
Now that we have a function, we need to use it. To do this, we will need to grab a data set that has exit codes that we want to get text for. Since each call to the Azure Function will count towards your consumption in Azure and ultimately cost you some money, you will want to get a distinct list of values in your data set then use that data set as a cross reference table for other Power BI tables. I will be using the ConfigMgr CI_AssignmentStatus table from the ConfigMgr database.
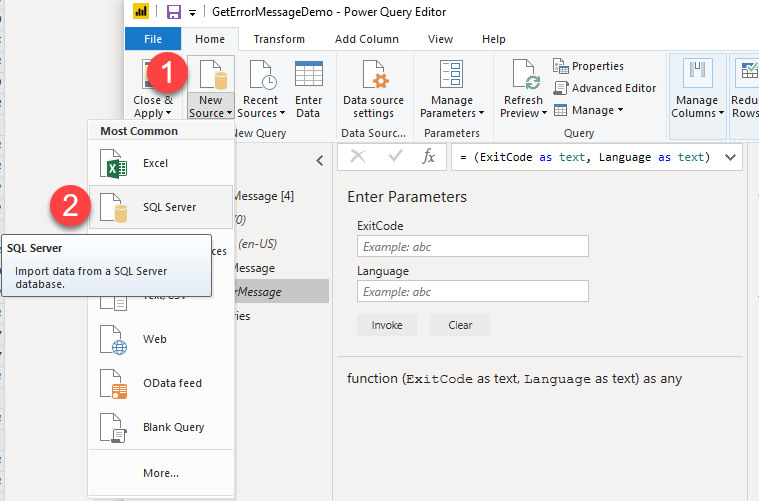
To start, we need to add the ConfigMgr SQL database as a new data source. Click on New Source then click SQL Server.
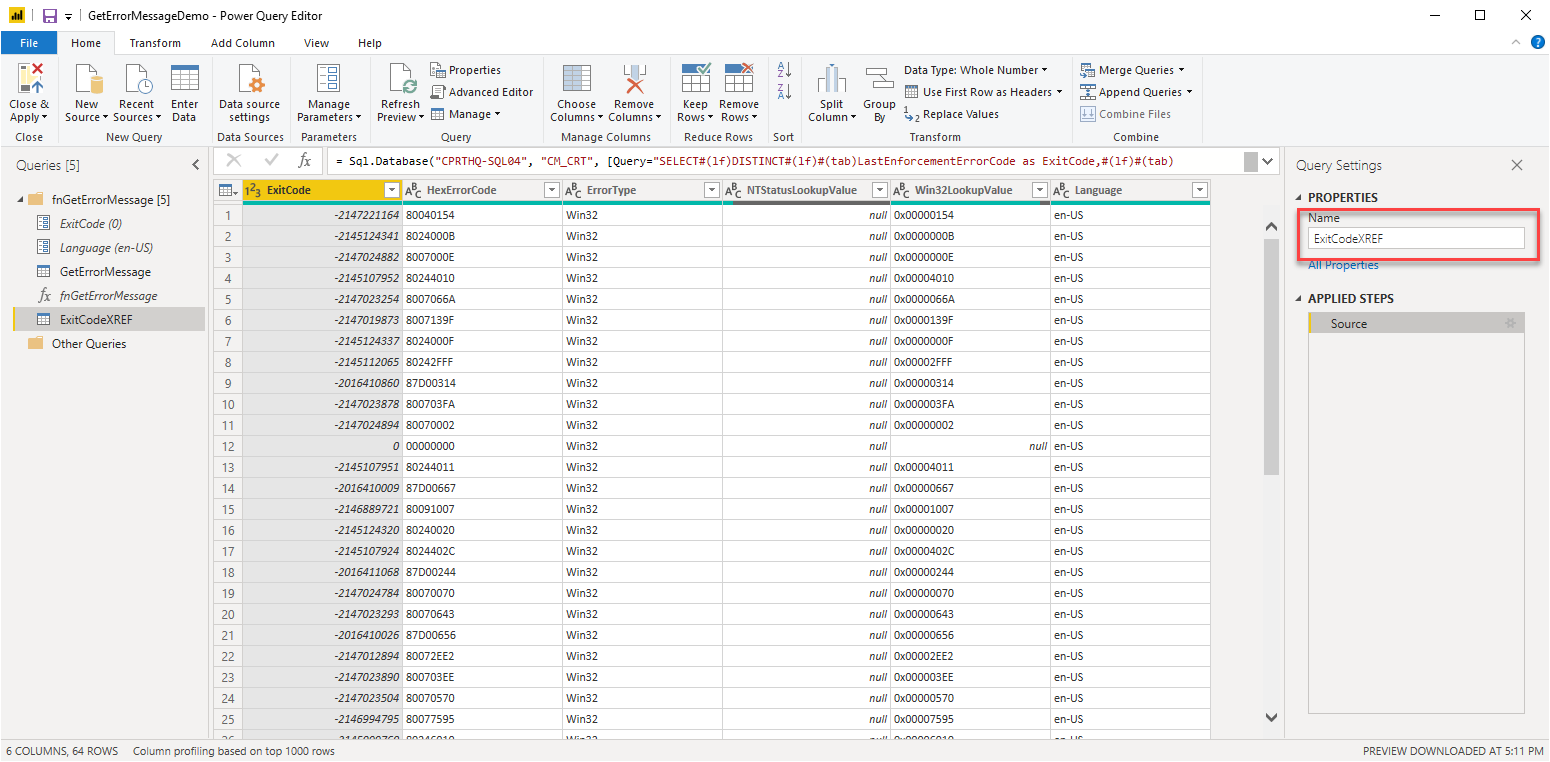
Enter your database server name and database name. I highly recommend creating new parameters for Server and DB since you will likely reference them several times in any given report. It’s just a good habit to get into. Add the SQL query below. Be sure to use Import, not DirectQuery and click OK when done. Also, for the purpose of this demo, I’ve added a custom Language column with en-US hardcoded into it. You can change this to your language or use parameters in Power BI if you need to.
| |

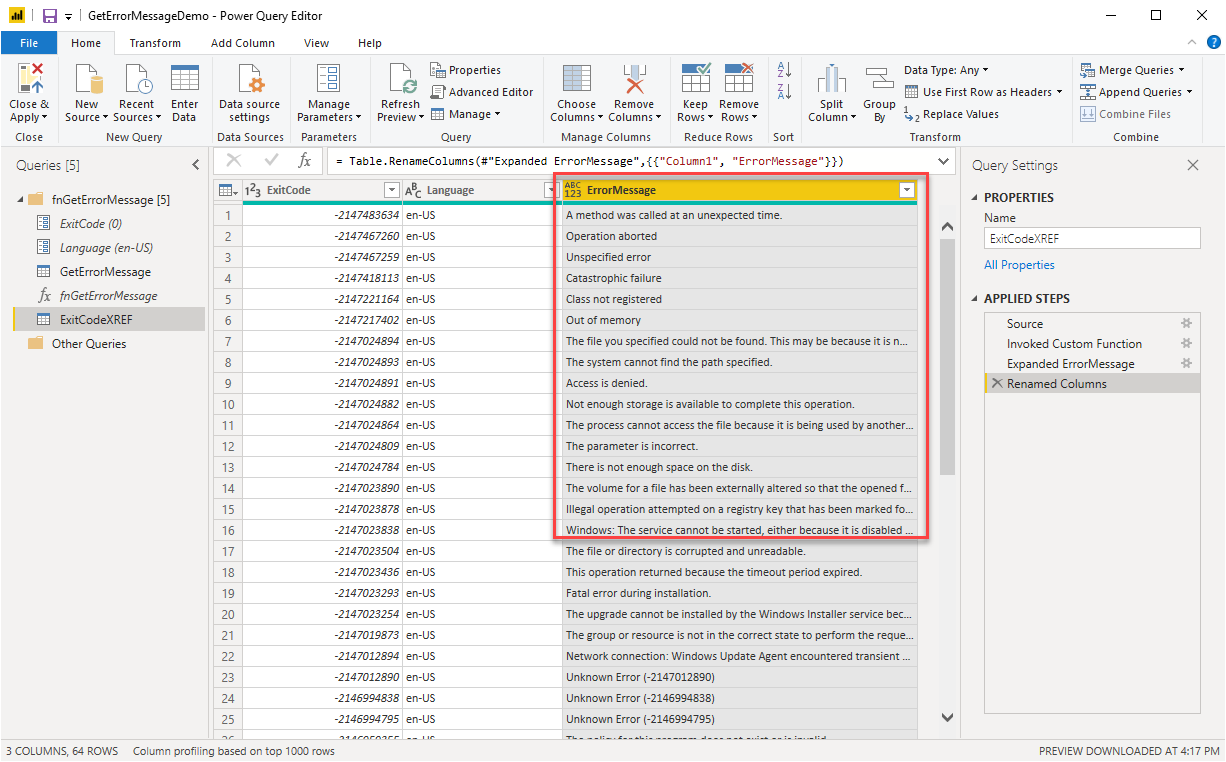
Rename the data set to ExitCodeXREF
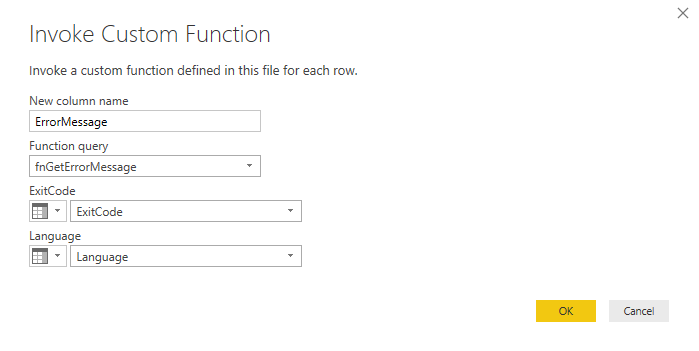
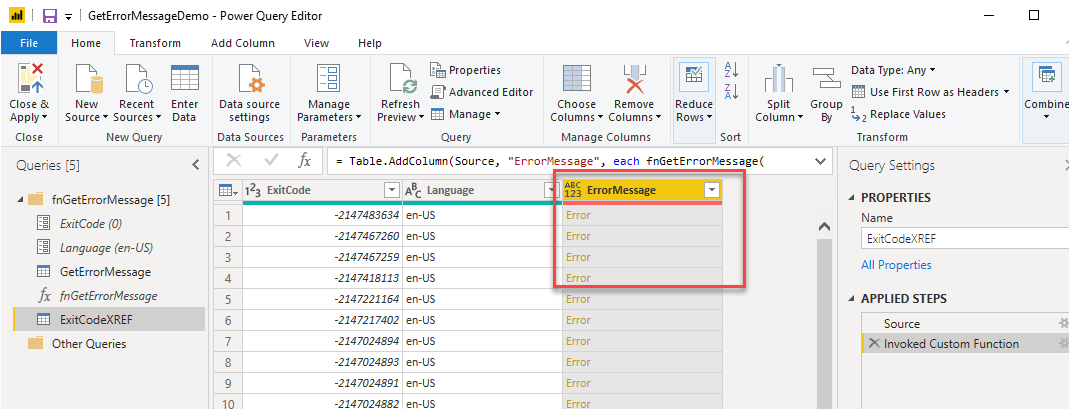
Next we need to look up the Error Message text and add it to the XREF table. We do this by Invoking a Custom Function. Click Add Column then Invoke Custom Function.

Enter the name of the new column ErrorMessage then select the function name and parameters. It should look like this when you are done.
The function will likely return an error code as below. You will need to open the Advanced Editor to change the query.
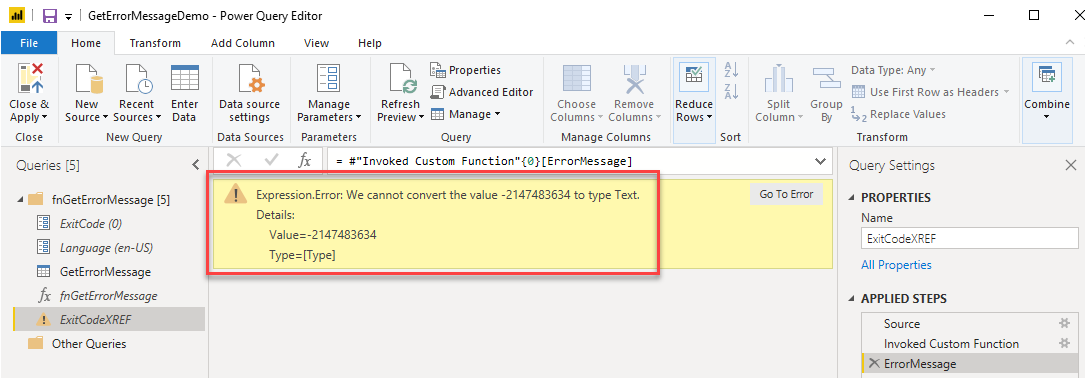
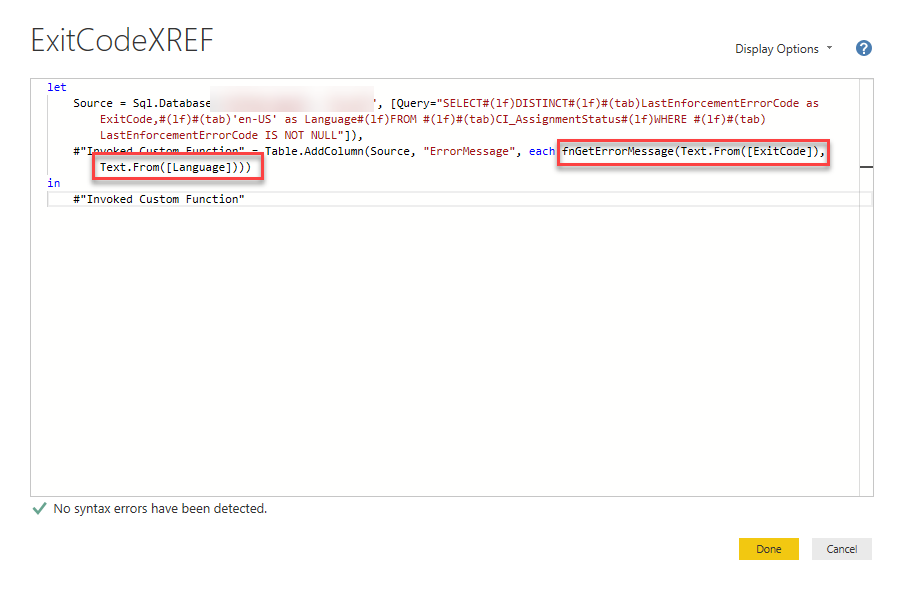
Click Advanced Editor from the ribbon. In the box, find the text fnGetErrorMessage([ExitCode], [Language]) and change to fnGetErrorMessage(Text.From([ExitCode]), Text.From([Language])). This will convert the negative integer values to text.
Select the double arrow symbol on the ErrorMessage column and uncheck the Use original column name as prefix box and click OK.

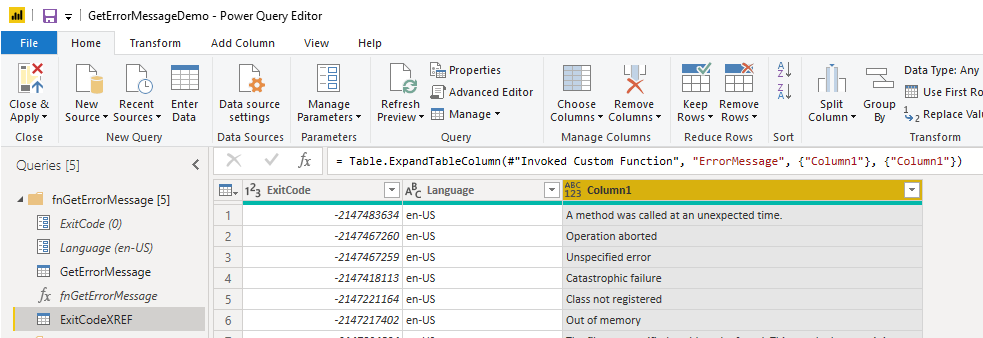
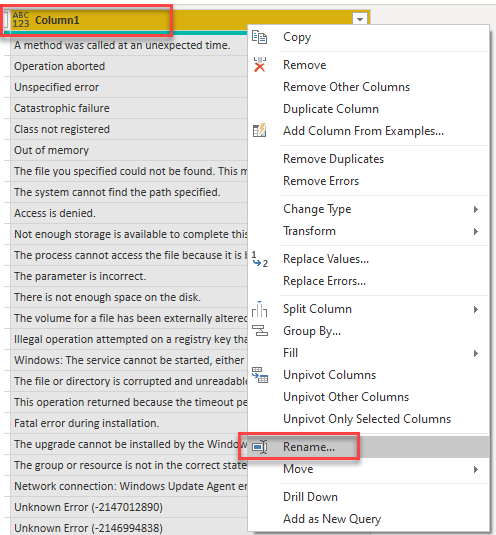
Right click on Column1 and click Rename and change to ErrorMessage
MAGIC!
Linking the XREF Table to Data Table for Reporting
Follow the steps above for adding a new data source and use the query below for the SQL query and rename the resulting table to DeploymentStatus.
| |
All Set. Click Close and Apply to go to the report design front end.

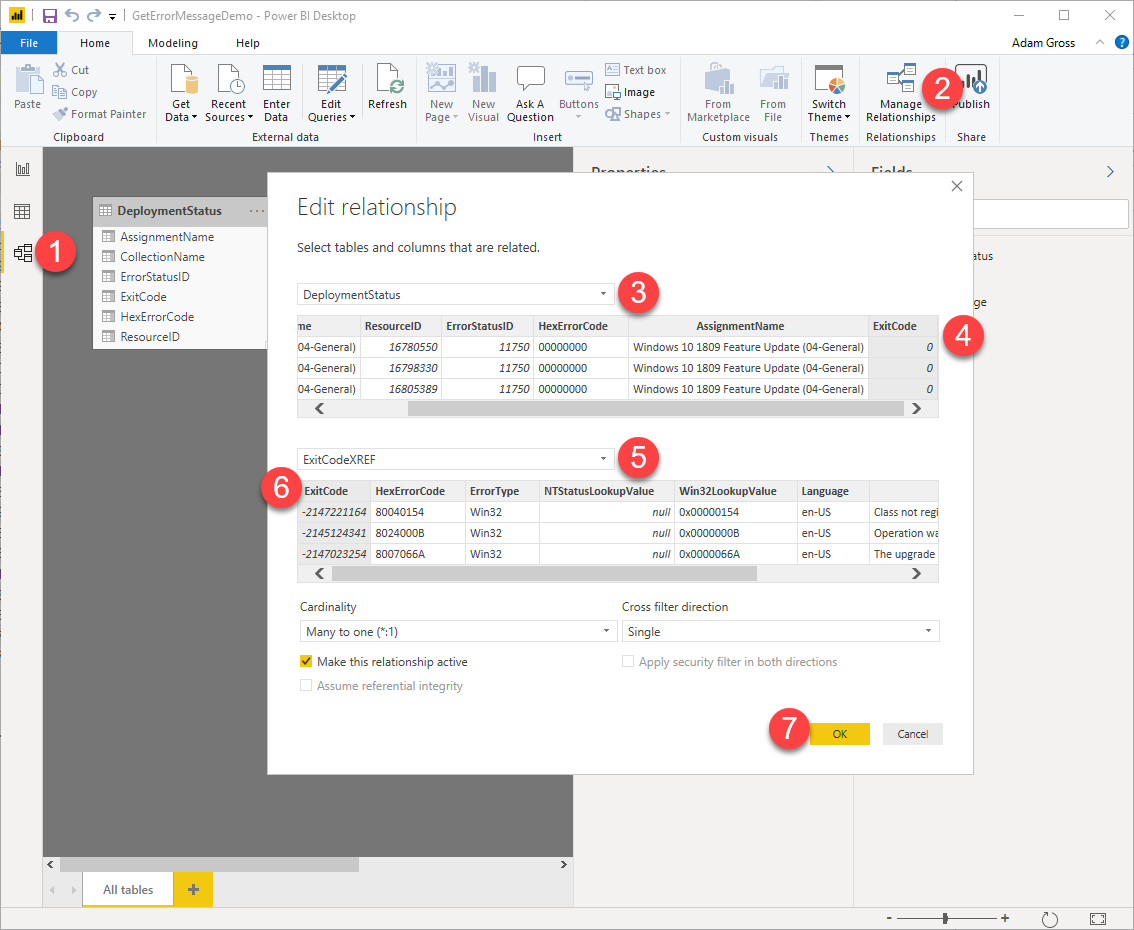
Click on the relationships icon on the left nav bar and ensure that the relationship between the DeploymentStatus table and ExitCodeXREF is set to Many to One on ExitCode.
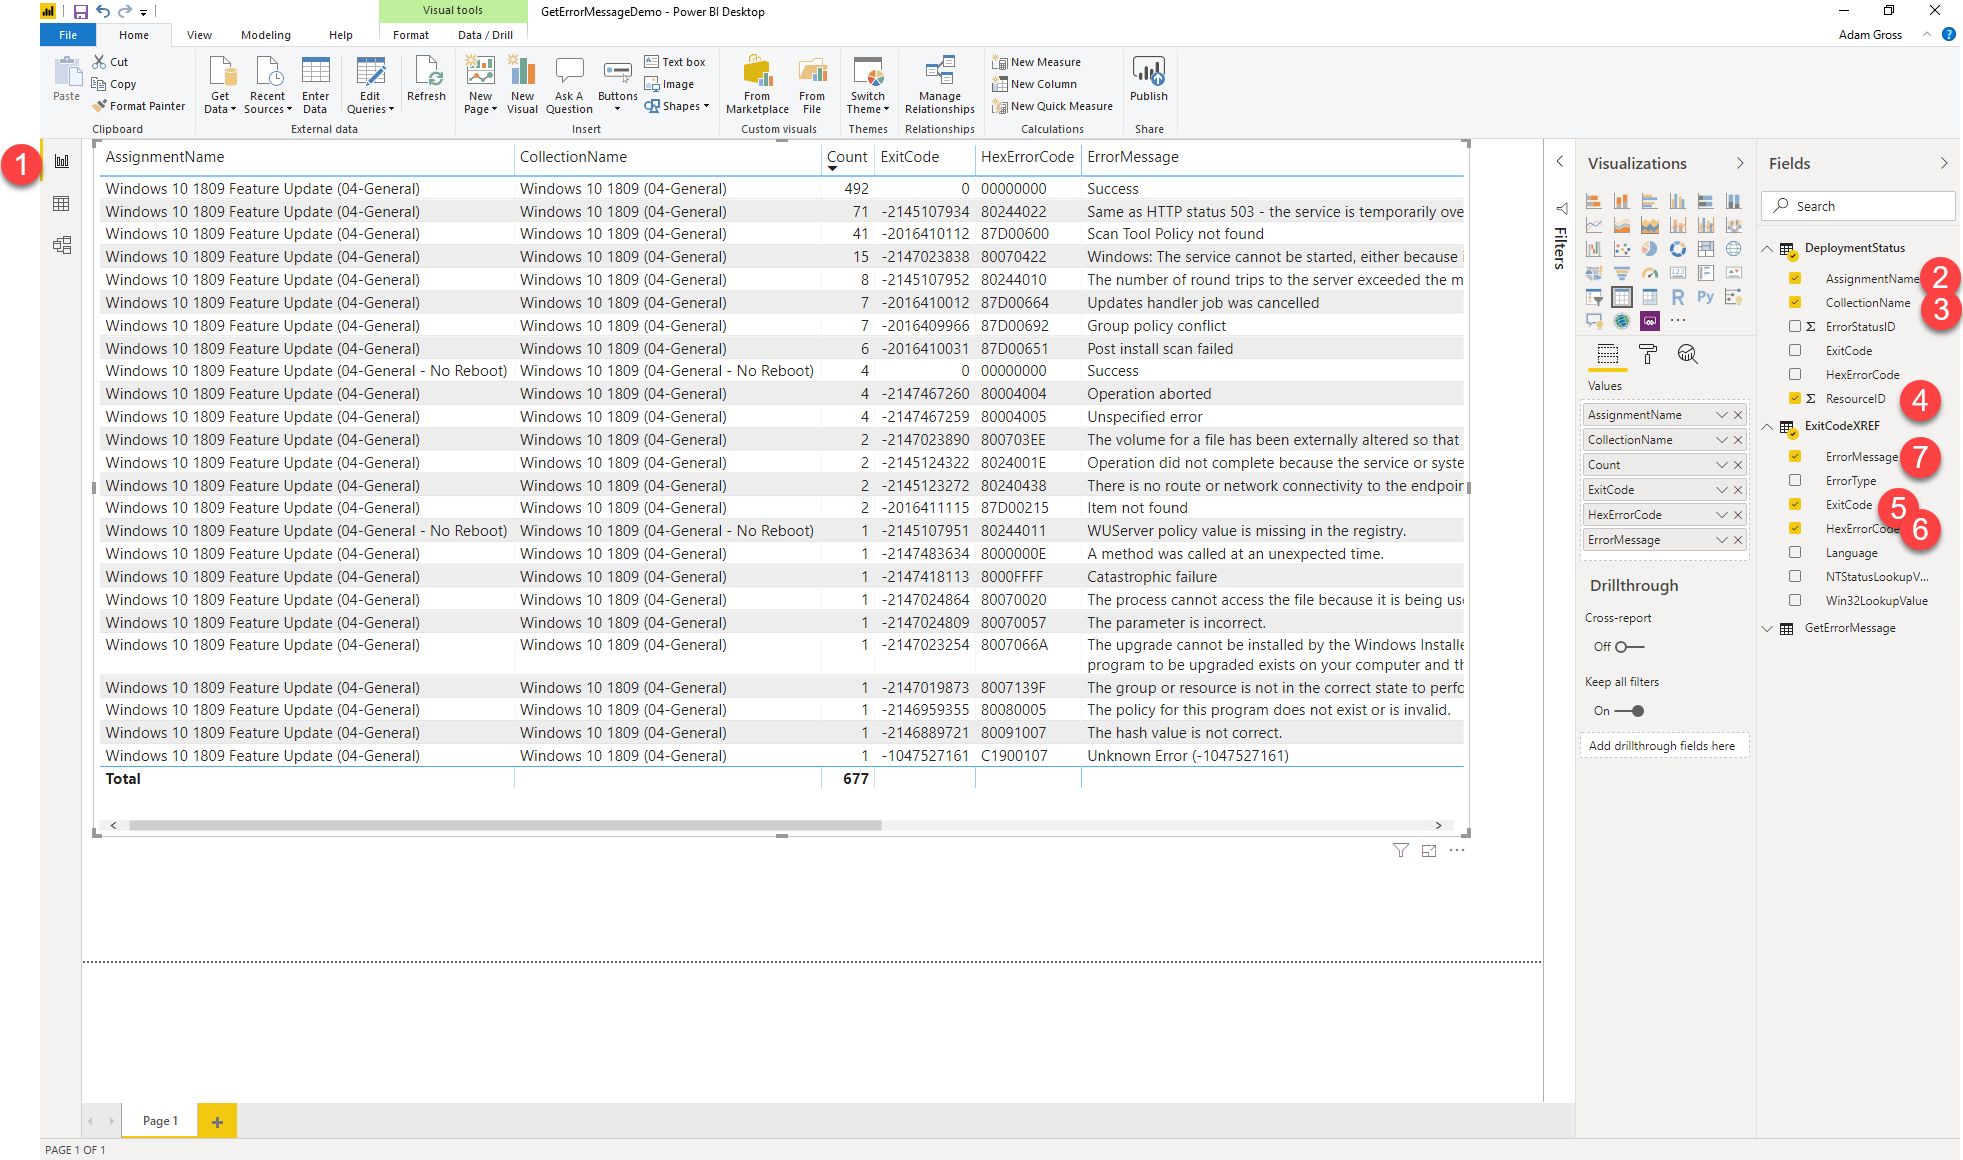
Switch back to the report view using the left nav then select the columns from each table to create a table with results.
Summary
That’s about it. Hopefully you were able to follow along. This post does assume that you are at least somewhat familiar with Power BI. Ping me if you’ve got any issues or questions.
This is the final part on this series (for now). Since SRSResources.dll doesn’t look up Windows 10 upgrade codes, those will be displayed as Unknown Error generally. I’m working on additional reporting to handle those as well. Maybe I’ll get around to them before it all gets changed and stops working!
I hope this inspires you to experiment with Azure Functions and Power BI.