This is Part 3 in my Configuring 802.1x Authentication for Windows Deployment series. Be sure to check out all of the other parts here.
You will need all of the files you created in Part 1 for this part.
During a Bare Metal/Wipe & Load OSD Task Sequence, the Task Sequence will start in WinPE and copy down the OS installation files. Once Windows as been installed, the Task Sequence will boot out of WinPE and into the new OS. WinPE doesn’t pass any of the authentication information to the new OS, so you will need to re-authenticate with 802.1x. To accomplish this, you need to copy your 802.1x authentication script down locally and add an entry to your Unattend.XML to launch the script at during the correct pass in Windows setup.
Unattend.XML
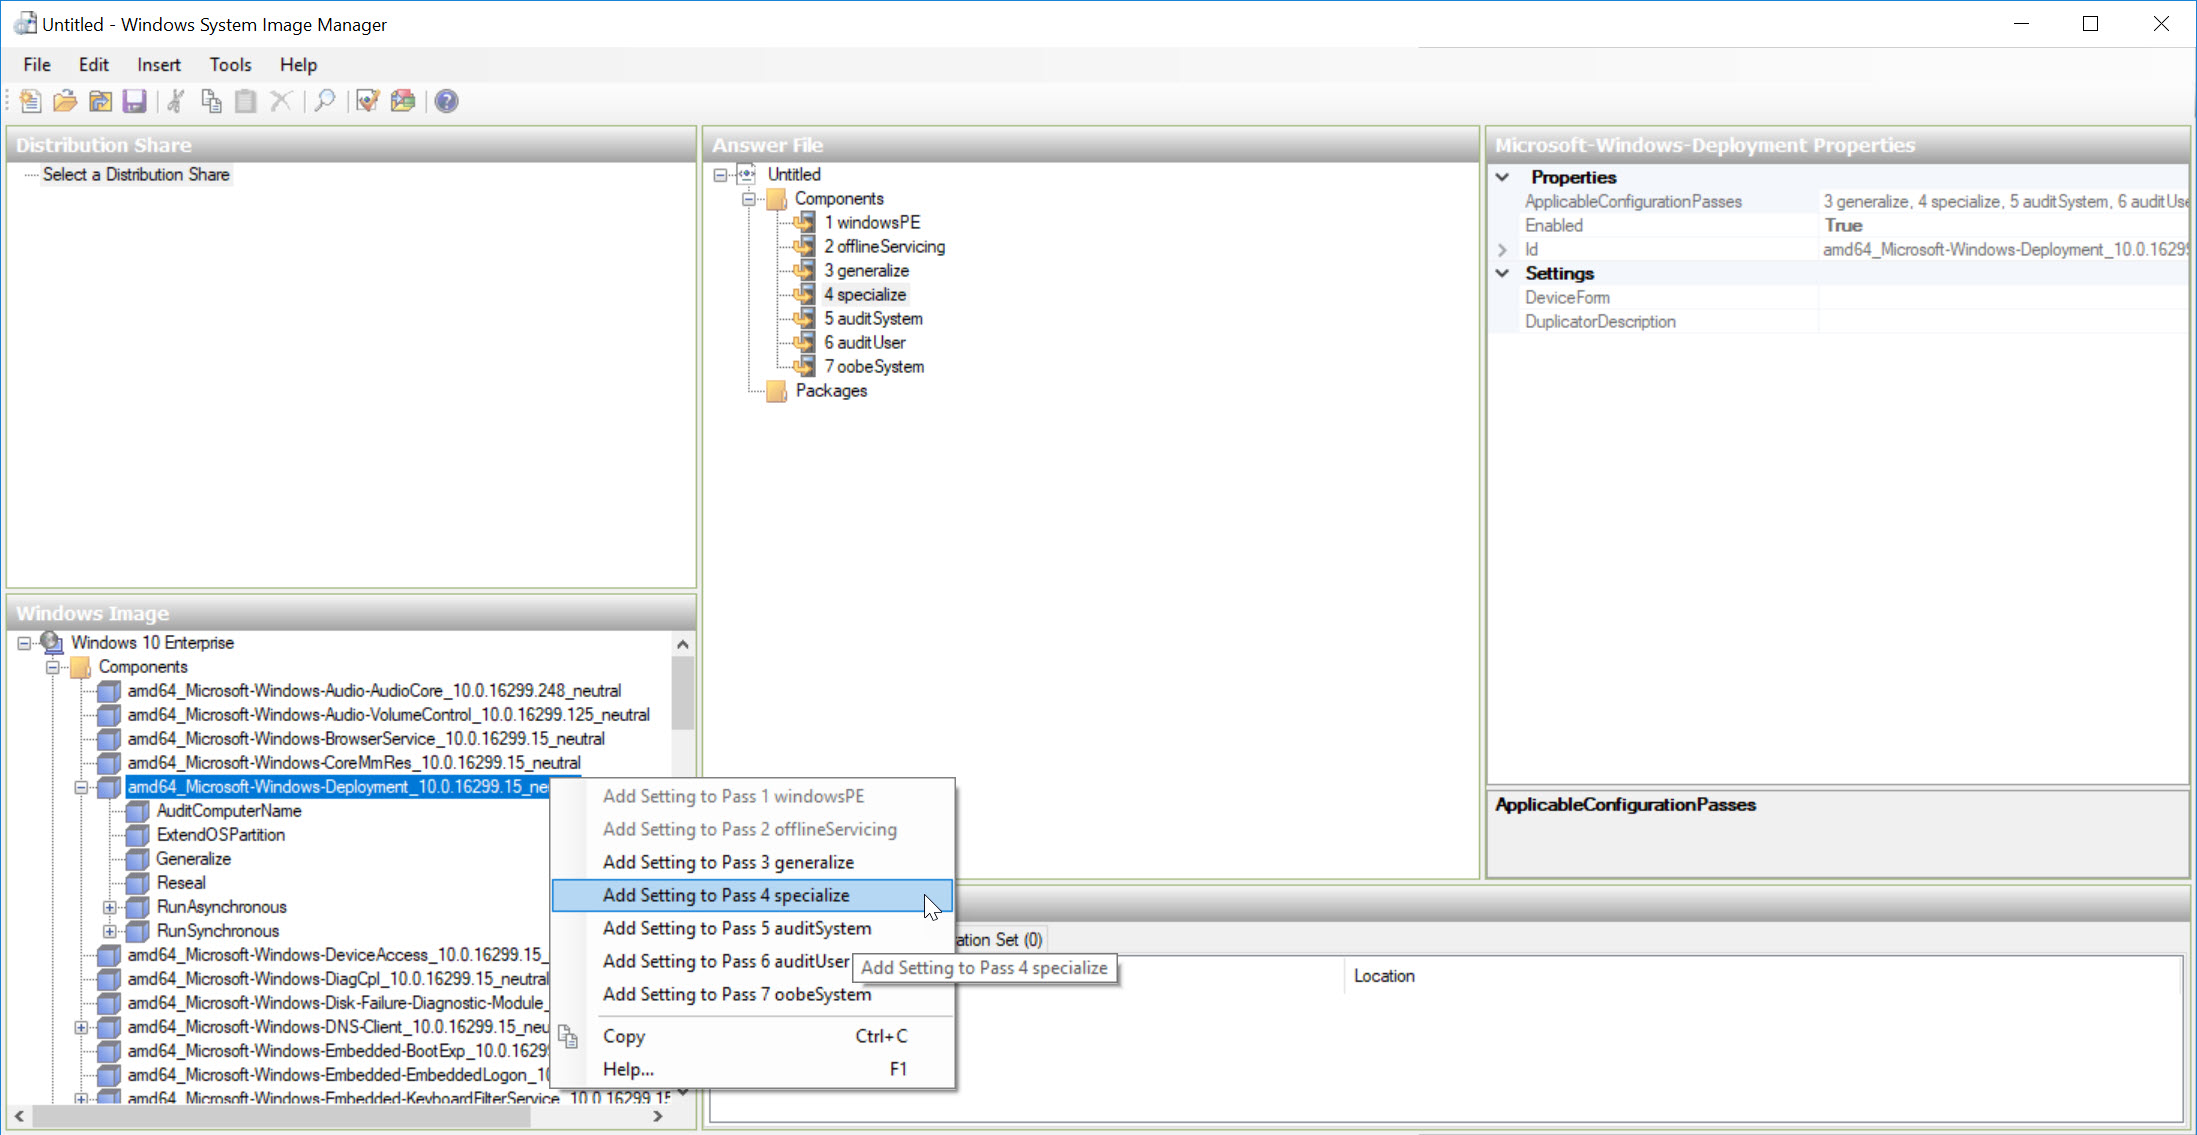
You can edit your Unattend.XML using the Windows System Image Manager that’s part of Windows ADK or you can manually edit it. The script needs to run during specialize pass.
After loading your OS media into WSIM, follow the steps below to add the commandline for your 802.1x authentication script.
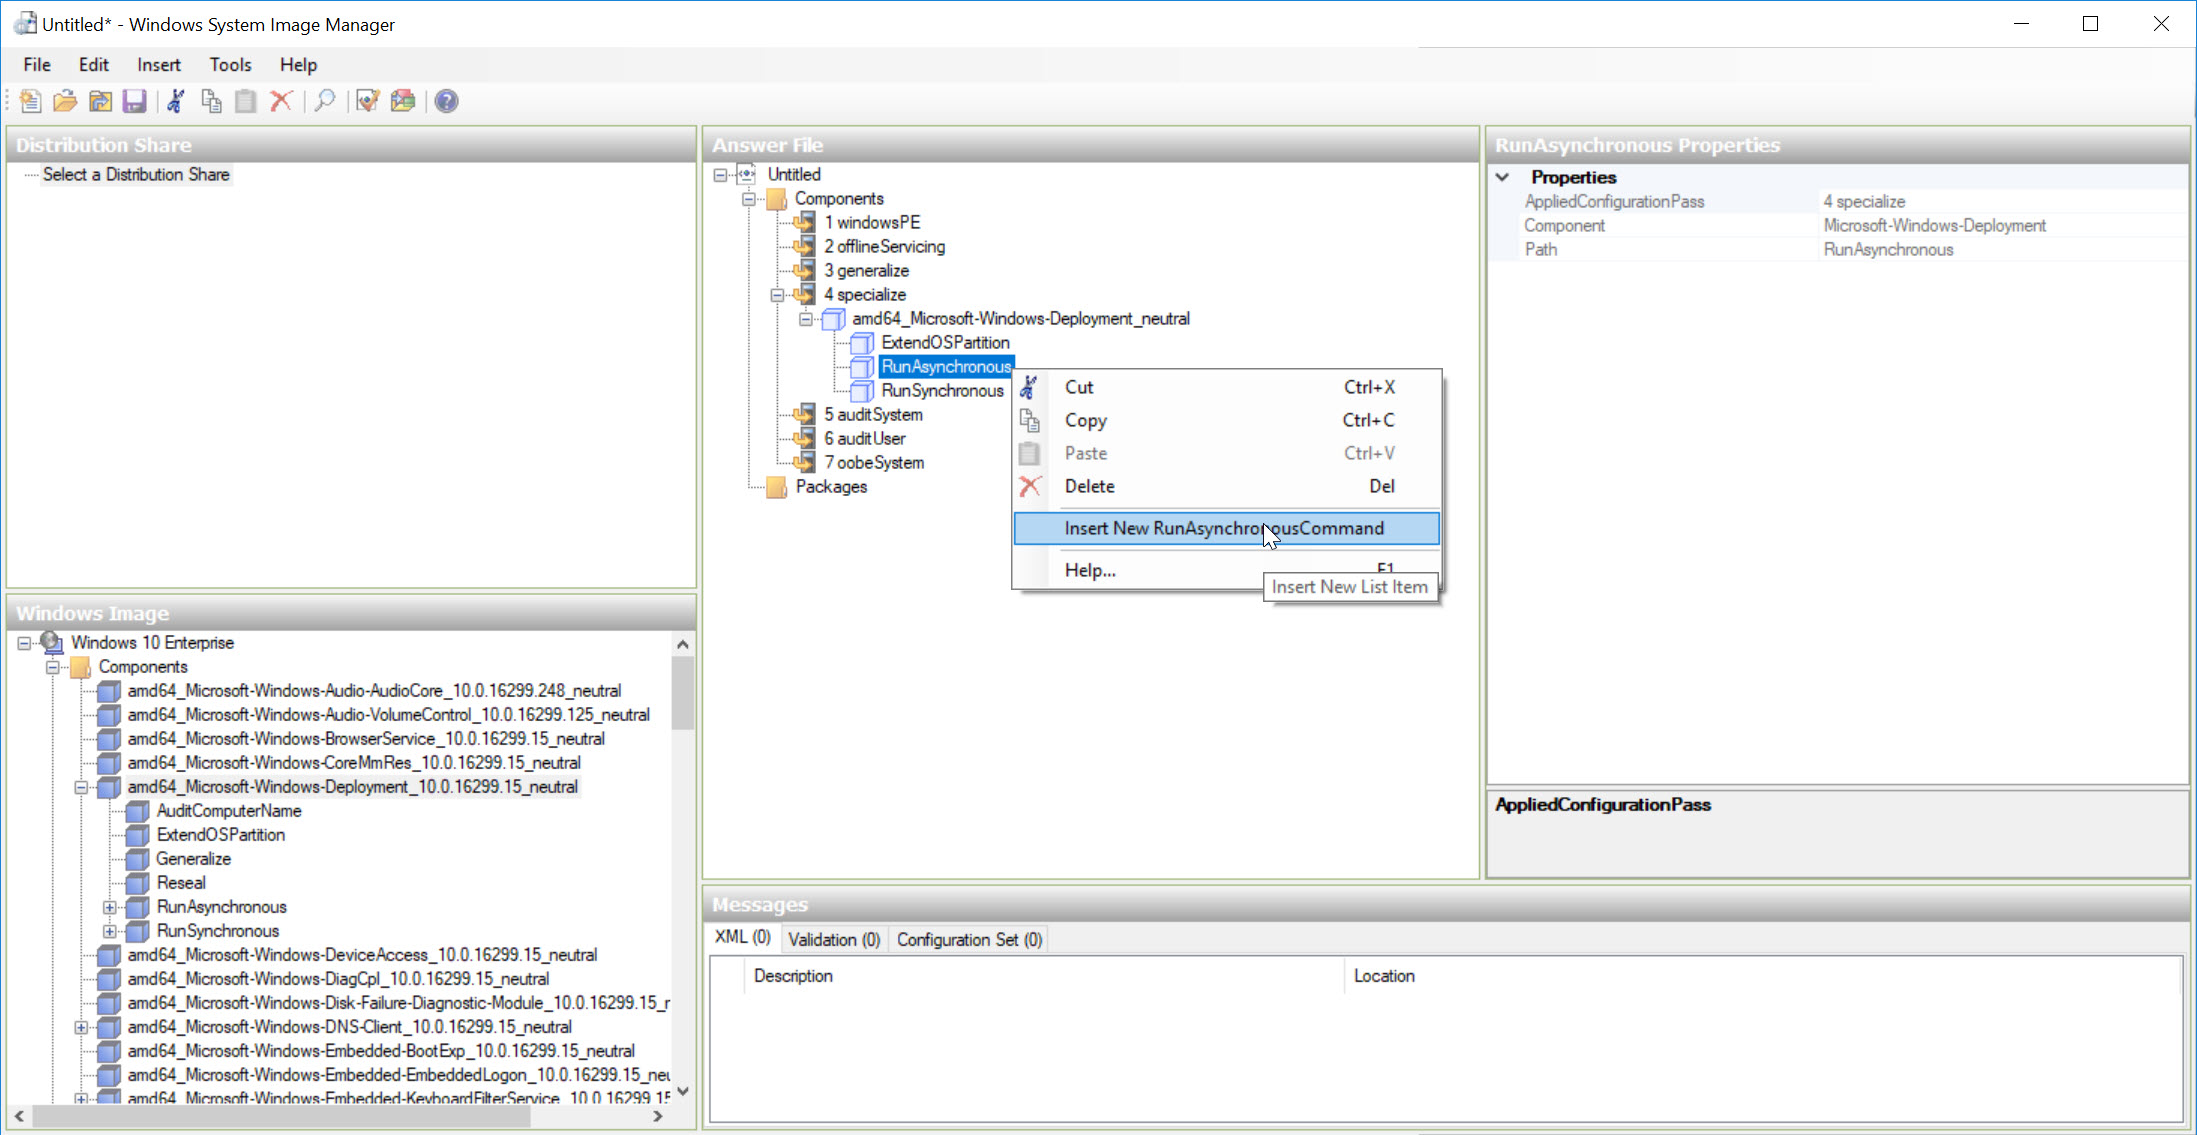
Add the following as the Path. It should point to the location where you will copy your auth package to in the next step.
cmd /c C:\Temp\ImportComputerAuthProfile.bat
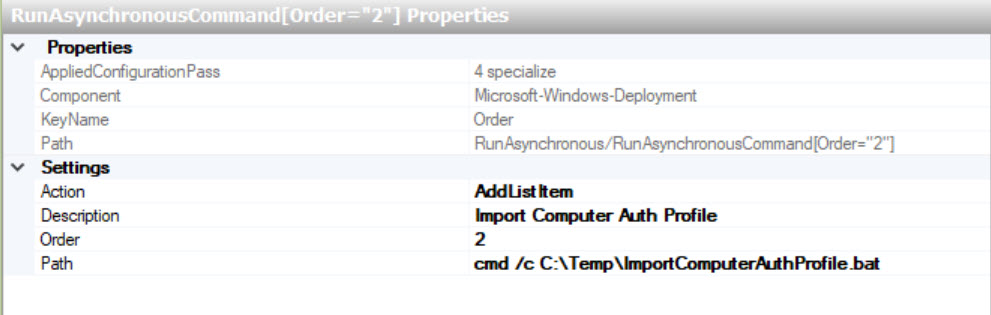
This is what the resulting XML should look like.
| |
Adding everything to your Bare Metal Task Sequence
Create a new Package in ConfgMgr and include all of your script files in the package. Then add a new Run Command Line Task Sequence step before Install Operating System step. Set the Package source to the new package your created.
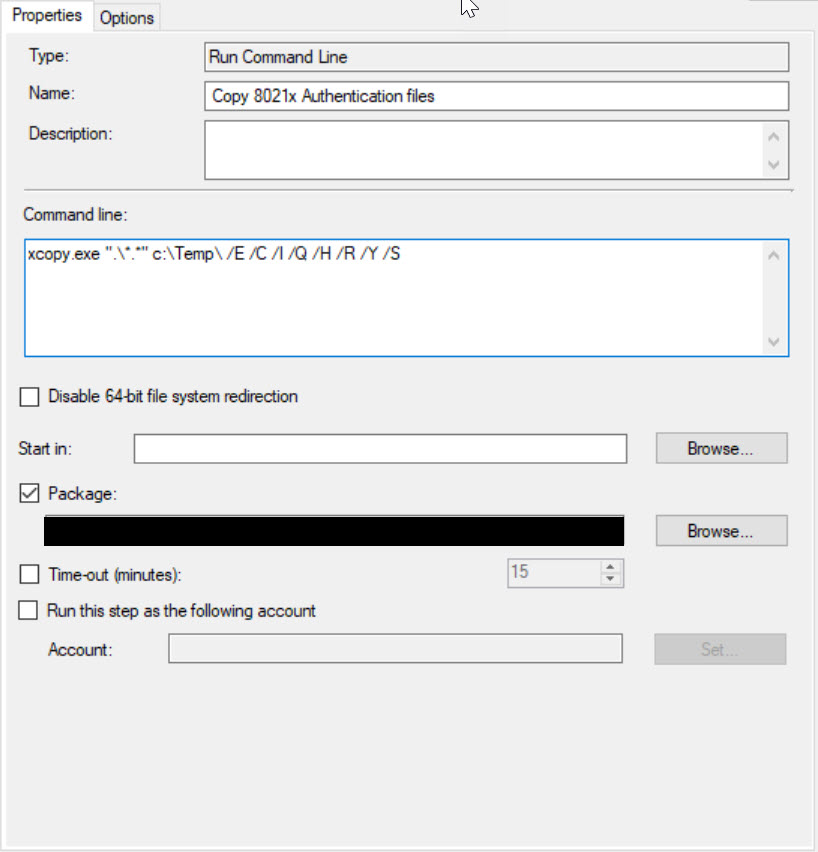
The path in this command line needs to match the path in the Unattend.XML file.
xcopy.exe ".\*.*" c:\Temp\ /E /C /I /Q /H /R /Y /S
That’s it for your Bare Metal Task Sequence. If you’ve been following the steps and testing, you should be able to build a Bare Metal build using Computer Authentication on an 802.1x protected network.
Part 4 Covers In-Place Upgrades